Add two factor authentifcation (2FA) to paperless-ngx
It's a queasy feeling when you finally have your documents digitized, but access to them is still secured with the old username and password method.
However, this can be upgraded with the help of the free application authelia and a NGINX reverse proxy.
Before you start
This guide does not describe how to install paperless-ngx.
I assume that paperless-ngx runs behind NGINX as a reverse proxy.
For Authelia you need a subdomain like authelia.example.org.
This subdomain must be secured with https, e.g. via letsencrypt.
Authelia also requires an email address to send the device registration mail.
Install authelia
The installation of authelia is not exactly straight forward.
Authelia installs as a Docker application, but uncharacteristically for container applications, expects a lot of upfront work from the user before you can even use it.
Overview and prequisites:
We install Authelia as a Docker swarm service.
For the configuration of Authelia, we create two folders "config" and ".secrets" in the same directory as.
In the secrets directory we store passwords and keys for encryption.
In the config directory is our sqlite3 database (authelia.db), our user database (users_database.yml) and our actual configuration (configuration.yml).
.
├── config
│   ├── authelia.db
│   ├── configuration.yml
│   └── users_database.yml
├── createSecrets.sh
├── docker-compose.yml
└── .secrets
    ├── JWT_SECRET
    ├── REDIS_HOST_PASSWORD
    ├── SESSION_SECRET
    ├── STORAGE_ENCRYPTION_KEY
    └── STORAGE_PASSWORD
The createSecrets.sh file is a bash script I wrote to simplify the creation of the keys.
For randomization openssl is used.
Install this via:
# Debian/Ubuntu
sudo apt install openssl

# Fedora/CentOS/RHEL
sudo dnf install opensslSince we are currently only protecting one application, sqlite is more than sufficient as a database. Install this with the following command:
# Debian/Ubuntu
sudo apt install sqlite3

# Fedora/CentOS/RHEL
sudo dnf install sqliteRedis is installed via docker compose.
Docker
Create a folder authelia and open it.
Now create the necessary folders and enter the config folder:
mkdir config && mkdir .secrets
cd configCreate the SQlite database as follows:
sqlite3 authelia.db
SQLite version 3.40.0 2022-11-16 12:10:08
Enter ".help" for usage hints.
sqlite> .databases
main: config/authelia.db r/w
sqlite> .quit
Copy the user database template from the Authelia repo or create your own:
# users_database.yml
---
# Users Database   #
# This file can be used
# if you do not have an LDAP set up.

# List of users
users:
  authelia:
    disabled: false
    displayname: "Authelia User"
    # Password is authelia
    password: <create password via docker, see below>
    email: [email protected]
    groups:
      - admins
      - dev
...
The structure of the yml file is easy to understand.
You can get the password hash directly from the Authelia Docker container:
docker run authelia/authelia:latest \
'username'
hash-password 'yourpassword'Create main configuration
Copy and paste the following configuration.yml file and adjust the settings with pointed brackets.
# Authelia configuration #


server:
  host: 0.0.0.0
  port: 9091

log:
  level: debug

default_redirection_url: https://<Sub>.<Domain>
# i.e. https://auth.example.org
totp:
  issuer: <Domain>
  # i.e. example.org
  period: 30
  skew: 1


authentication_backend:
  disable_reset_password: false
  file:
    path: /config/users_database.yml
    password:
      algorithm: argon2id
      iterations: 1
      salt_length: 16
      parallelism: 8
      memory: 64

access_control:
  default_policy: deny
  rules:
    # Rules applied to everyone
    - domain:
        - "<yourPaplerless-ngx Domain>"
        # i.e. paperlessngx.example.org
      policy: two_factor

session:
  name: authelia_session
  expiration: 3600 # 1 hour
  inactivity: 7200 # 2 hours
  domain: <rootDomain>
  # Should match whatever your root protected domain is

  redis:
    host: authelia-redis-1
    port: 6379


regulation:
  max_retries: 5
  find_time: 2m
  ban_time: 10m

theme: dark

storage:
  local:
    path: /config/authelia.db

notifier:
  smtp:
    username: <YourEmailUsername>
    password: <YourEmailPassword>
    host: <YourEmailHost>
    port: <YourEmailSMTPPort>
    sender: <YourAutheliaSenderAdress>
    subject: "[Authelia] {title}"
    disable_require_tls: false
    disable_html_emails: false
Create secrets
Just copy and paste the following script:
#!/bin/bash
# Create secrets for Authelia
# JWT_SECRET  SESSION_SECRET
# STORAGE_ENCRYPTION_KEY  STORAGE_PASSWORD
# Create redis Password
# REDIS_HOST_PASSWORD

if [ -d ".secrets" ]; then
  echo "Installing secrets files in $PWD/.secrets"
else
  mkdir .secrets
fi

for secret in JWT_SECRET  SESSION_SECRET  STORAGE_ENCRYPTION_KEY  STORAGE_PASSWORD REDIS_HOST_PASSWORD
do
    echo $secret
    temp=$secret
    createdSecret=$(openssl rand -hex 64)
    echo $createdSecret > .secrets/$temp
    echo "created $temp"
done
echo "secrets are in $PWD/.secrets/"
#EOF
Run the script by:
chmod +x createSecrets.sh
./createSecrets.sh
In order to avoid that you start the script by mistake, I recommend to delete it after successful execution.
Docker compose file
Go back to your authelia root folder and create your docker-compose.yml.
Just copy and paste the following configuration:
---
version: "3.8"

secrets:
  JWT_SECRET:
    file: ${PWD}/.secrets/JWT_SECRET
  SESSION_SECRET:
    file: ${PWD}/.secrets/SESSION_SECRET
  STORAGE_PASSWORD:
    file: ${PWD}/.secrets/STORAGE_PASSWORD
  STORAGE_ENCRYPTION_KEY:
    file: ${PWD}/.secrets/STORAGE_ENCRYPTION_KEY
  REDIS_HOST_PASSWORD:
    file: ${PWD}/.secrets/REDIS_HOST_PASSWORD

services:
  redis:
    image: redis:alpine
    volumes:
      - ./redis:/data
    restart: unless-stopped
    ports:
      - 127.0.0.1:6379:6379
    command: /bin/sh -c "redis-server --requirepass $$(cat /run/secrets/REDIS_HOST_PASSWORD)"
    secrets:
      - REDIS_HOST_PASSWORD


  authelia:
    image: docker.io/authelia/authelia:latest
    restart: on-failure:5
    ports:
      - 127.0.0.1:9091:9091
    secrets: [JWT_SECRET, SESSION_SECRET, STORAGE_PASSWORD, STORAGE_ENCRYPTION_KEY, REDIS_HOST_PASSWORD]
    environment:
      AUTHELIA_JWT_SECRET_FILE: /run/secrets/JWT_SECRET
      AUTHELIA_SESSION_SECRET_FILE: /run/secrets/SESSION_SECRET
      AUTHELIA_STORAGE_ENCRYPTION_KEY_FILE: /run/secrets/STORAGE_ENCRYPTION_KEY
      AUTHELIA_SESSION_REDIS_PASSWORD_FILE: /run/secrets/REDIS_HOST_PASSWORD
    volumes:
      - ${PWD}/config:/config
    depends_on:
      - redis
Start the stack with the following command:
docker compose up -dNGINX reverse proxy
Send auth_requests to authelia
Go to your NGINX configuration directory in /etc/nginx/ and create a directory authelia.
cd /etc/nginx/
mkdir authelia
cd authelia
Create the configuration file auth.conf and add the following lines via copy and paste:
# Basic Authelia Config

# Send a subsequent request to Authelia to verify if the user is authenticated
# and has the right permissions to access the resource.
auth_request /authelia;

# Set the `target_url` variable based on the request.
# It will be used to build the portal
# URL with the correct redirection parameter.
auth_request_set $target_url $scheme://$http_host$request_uri;
# Set the X-Forwarded-User and X-Forwarded-Groups with the headers
# returned by Authelia for the backends which can consume them.
# This is not safe, as the backend must make sure that they come from the
# proxy. In the future, it's gonna be safe to just use OAuth.
auth_request_set $user $upstream_http_remote_user;
auth_request_set $groups $upstream_http_remote_groups;
auth_request_set $name $upstream_http_remote_name;
auth_request_set $email $upstream_http_remote_email;
proxy_set_header Remote-User $user;
proxy_set_header Remote-Groups $groups;
proxy_set_header Remote-Name $name;
proxy_set_header Remote-Email $email;

# If Authelia returns 401, then nginx redirects the user to the login portal.
# If it returns 200, then the request pass through to the backend.
# For other type of errors, nginx will handle them as usual.

error_page 401 =302 https://<AddYourAutheliaSubdomainHERE>/?rd=$target_url;
You need to adjust the line with your own authelia subdomain:
error_page 401 =302 https://<AddYourAutheliaSubdomainHERE>/?rd=$target_url;
Create another config file authelia.conf in the same directory and copy and paste the following lines:
 Virtual endpoint created by nginx to forward auth requests.
location /authelia {
    internal;
    set $upstream_authelia http://localhost:9091/api/verify;
    proxy_pass_request_body off;
    proxy_pass $upstream_authelia;
    proxy_set_header Content-Length "";

    # Timeout if the real server is dead
    proxy_next_upstream error timeout invalid_header http_500 http_502 http_503;
    # [REQUIRED] Needed by Authelia to check authorizations of the
    # Provide either X-Original-URL and X-Forwarded-Proto or
    # X-Forwarded-Proto, X-Forwarded-Host and X-Forwarded-Uri or both.
    # Those headers will be used by Authelia to deduce the target url of the user.

    # Basic Proxy Config
    client_body_buffer_size 128k;
    proxy_set_header Host $host;
    proxy_set_header X-Original-URL $scheme://$http_host$request_uri;
    proxy_set_header X-Real-IP $remote_addr;
    proxy_set_header X-Forwarded-For $remote_addr;
    proxy_set_header X-Forwarded-Proto $scheme;
    proxy_set_header X-Forwarded-Host $http_host;
    proxy_set_header X-Forwarded-Uri $request_uri;
    proxy_set_header X-Forwarded-Ssl on;
    proxy_redirect  http://  $scheme://;
    proxy_http_version 1.1;
    proxy_set_header Connection "";
    proxy_cache_bypass $cookie_session;
    proxy_no_cache $cookie_session;
    proxy_buffers 4 32k;

    # Advanced Proxy Config
    send_timeout 5m;
    proxy_read_timeout 240;
    proxy_send_timeout 240;
    proxy_connect_timeout 240;
}
Paperless-ngx NGINX modification
Add the following line to your paperless NGINX server config:
server{
...
    include authelia/authelia.conf;
# Authelia auth endpoint
location / {
...
        include authelia/auth.conf;
# Protect this endpoint
   }
}
Restart nginx
systemctl restart nginxFirst Authelia setup
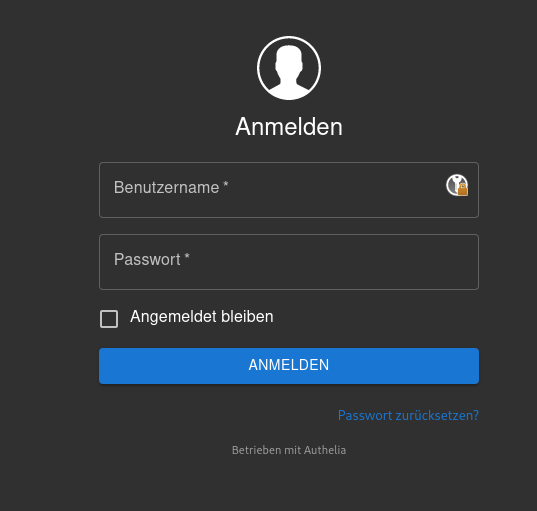
Go to the subdomain you have set up specifically for authelia and log in with the username and password you have configured in the authelia user database (users_database.yml)
Register your device
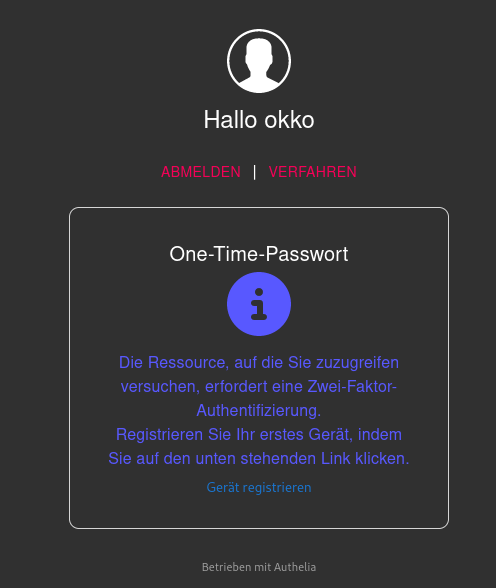
Authelia will now send an email to your configured user email address from the database.
After clicking on the link in the email, the device registration will be released.
You can now scan the QR code for TOTP.
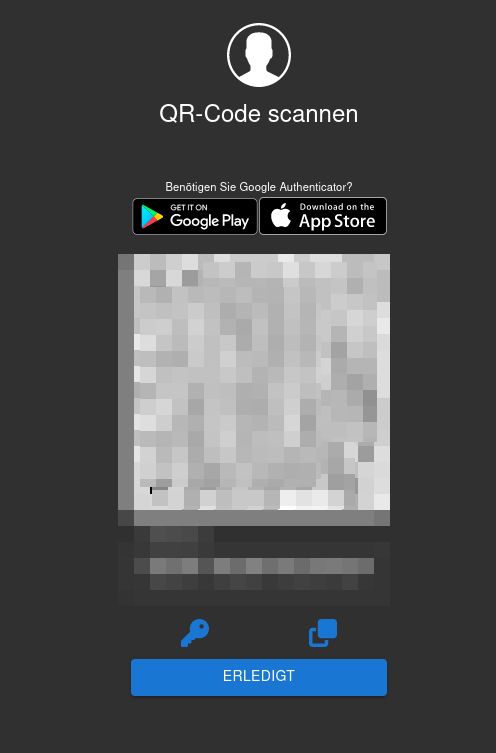
Apologies for the German screenshots.