Harden your public webserver (Part 2: crowdsec)
This is the second part of a three-part tutorial.
In recent years, the package "fail2ban" has proven its worth. However, experience shows that it is always the same players who try. An IP that attacks your server will also attack others.
So it's no wonder if you find the suspicious IP in databases like AbuseIPDB. So why not start before and prevent this IP from coming into contact with your server in the first place?
This is where crowdsec comes in:
Crowdsec is a free opensource application that does not allow IPs that have already been reported to reach you. But by installing it, you also automatically help the community by reporting suspicious IPs.
Crowdsec also has the advantage over Fail2Ban that your are not forced to block users. Sometimes a user just has a bad day and enters his password incorrectly several times. In this case, Crowdsec offers the possibility to display a so-called captcha.
Install crowdsec:
The installation is simple and consists of three steps:
- Install crowdsec repo:
curl -s \
https://packagecloud.io/install/repositories/\
crowdsec/crowdsec/script.deb.sh | sudo bash
2. Install a crowdsec:
apt install crowdsec
3. Install crowdsec bouncer:
apt install crowdsec-firewall-bouncer-iptables
Install and configure Crowdsec Nginx Bouncer
Now it's down to the nitty gritty:Crowdsec can be completely configured via the CLI (cscli) and extended via so-called collections.All extensions can be installed via the Crowdsec Hub.In the default settings web servers like Apache2 or NGINX are not checked!
For simplicity, I assume that NGINX is used, so we install the NGINX collection:
Install the dependencies:
apt install lua5.1 libnginx-mod-http-lua luarocks \
gettext-base lua-cjson
Install the nginx collection:
cscli collections install crowdsecurity/nginxCrowdsec checks the logs with the help of so-called parsers. We provide the sources here:
/etc/crowdsec/acquis.yamlIn the default settings the default sources of NGINX are set:
#Generated acquisition file
#- wizard.sh (service: nginx)
#/ files : /var/log/nginx/error.log
# /var/log/nginx/access.log
filenames:
  - /var/log/nginx/error.log
  - /var/log/nginx/access.log
labels:
  type: nginx
Change the filenames path if you use a different logpath.
Install nginx bouncer:
apt install crowdsec-nginx-bouncerAnd last but not least we configure the bouncer:
/etc/crowdsec/bouncers/crowdsec-nginx-bouncer.confIf oyu want to use a recaptcha validation you need to change the following lines:
# ReCaptcha Secret Key
SECRET_KEY=XXXX
# Recaptcha Site key
SITE_KEY=XXXX
Note that only recaptcha version 2 is supported.
If you want all suspicious logins to receive a captcha, change the following line:
BOUNCING_ON_TYPE=all
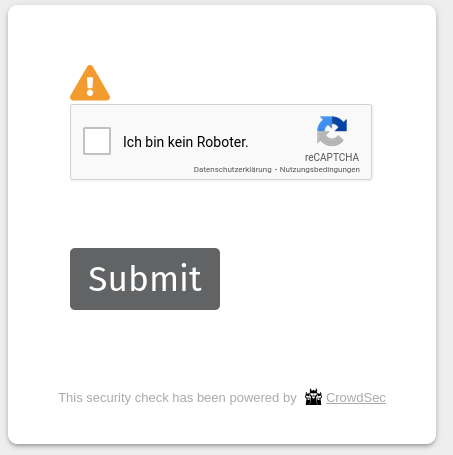
# change all to captchaTest your setup:
cscli decisions add -i <YourIP> -t captchaYou should get a captcha message when you access your website:
Remove your ip from the decisions list:
cscli decisions delete -i <YourIP>Optional steps
Sign up for Crowdsec to view remote alerts.
Enable two-factor authentication in the account settings.
Add your server to Crowdsec (it's for free):
Click on "Add instance" and you will see the command to add your server
For example:
sudo cscli console enroll XXXXXXXXXXXXXXXXXCopy and paste this command on your server.
Your server will not be displayed until you accept the new instance on the Crowdsec site.