Add 2FA in OPNsense NGINX reverse proxy
Everybody knows 2FA for the Web GUI of OPNsense. But there is a hidden possibility to secure webapps behind the NGINX reverse proxy.
Not every web app currently supports 2FA. Unfortunately, this also includes the recently introduced Paperless-ngx.
However, using Paperless-ngx as an example, I will show how to secure webapps with 2FA on your OPNsense firewall.
Be forewarned, however, that if I had a choice, I would always go for Authelia.
Create a readonly user for 2FA in OPNsense
For security reasons, please do not reuse an admin user or an administrative user as a 2FA user.
The user we want to create should not have any rights in the web GUI.
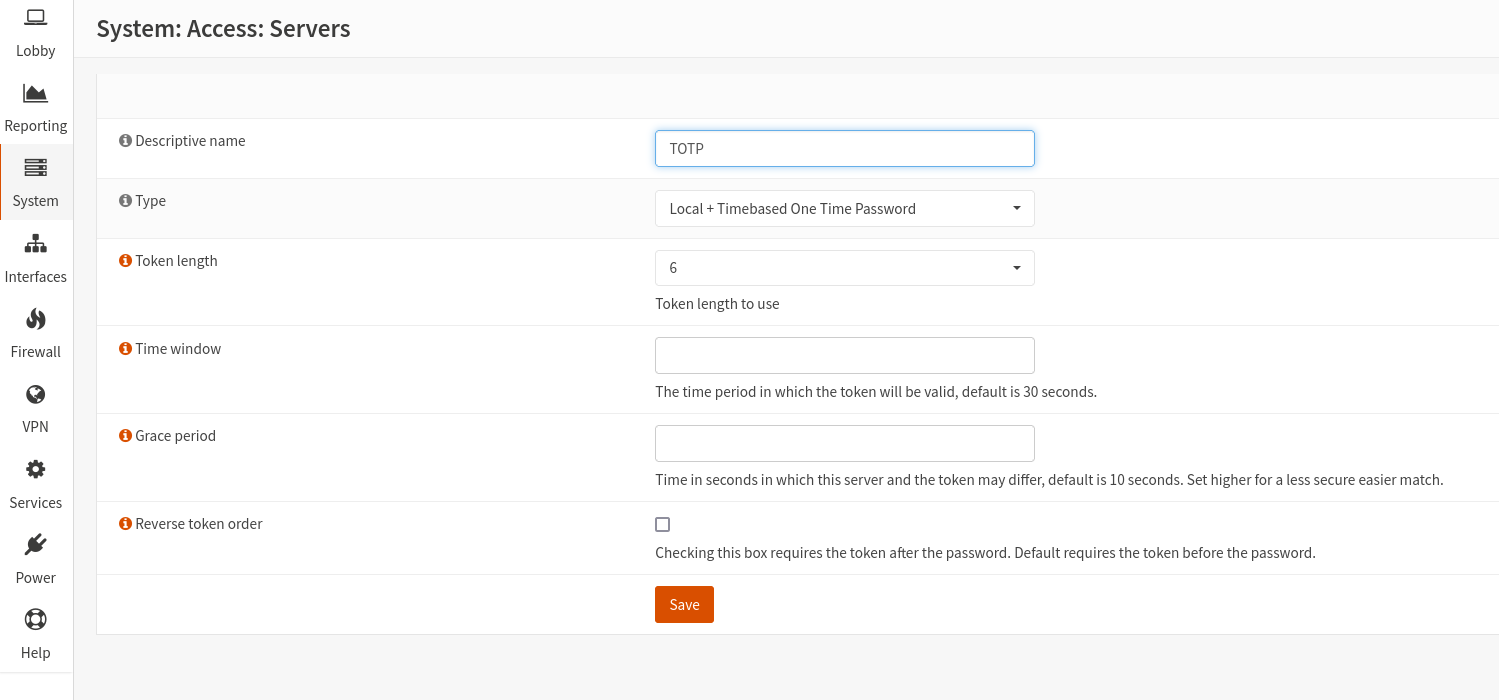
Login to OPNsense and create a new TOTP Access Server (System/Access/Servers) if you have not configured one yet.
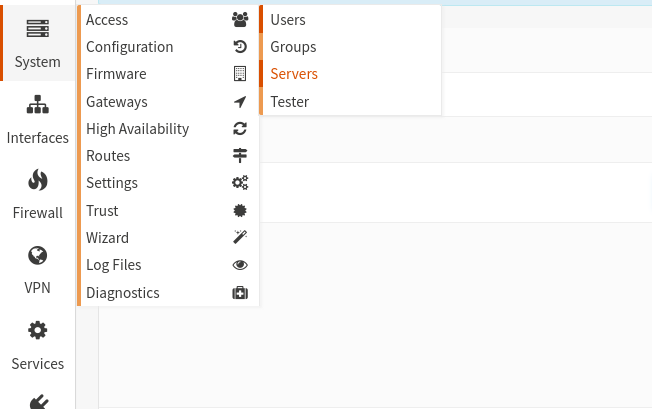
Type: Local + Timebase One Time Password:
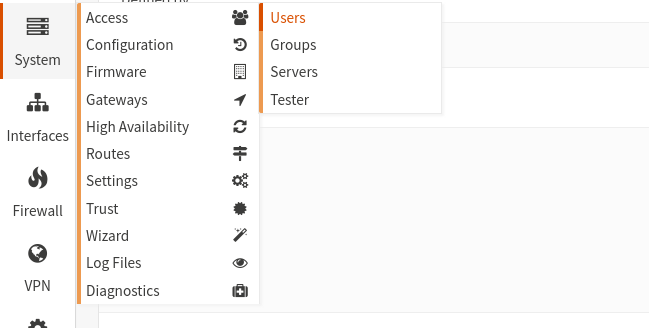
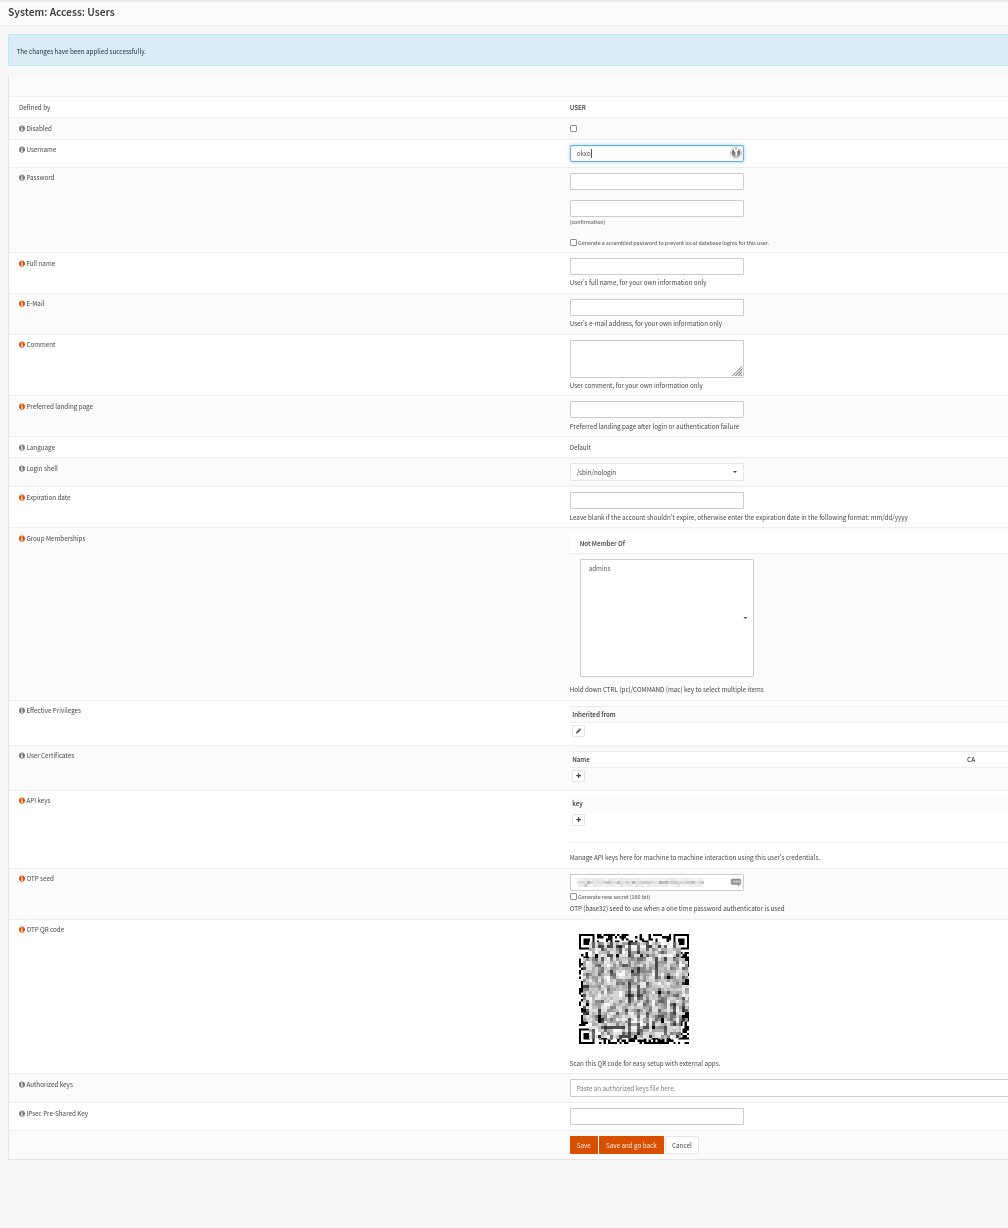
Now go to the users setting and create a new user.
Do not choose a username from a username you already use in paperless-ngx, because you will quickly get confused.
You will have to enter a password, but since we are more interested in the second factor, use a simple one.
I chose "77" as password.
Create an "OTP seed" by checking the "Generate new secret" box.
The seed and the QR code will appear only after the first saving.
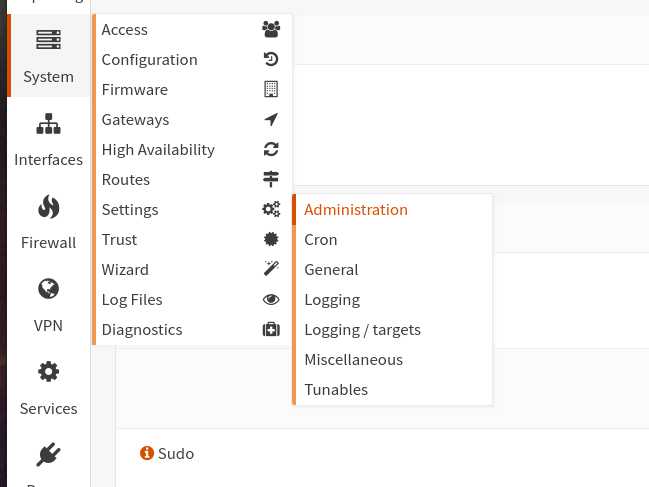
If you have created the TOTP server for the first time, you have to activate it first.
You can find the settings for this under System/Settings/Administration (see images below).

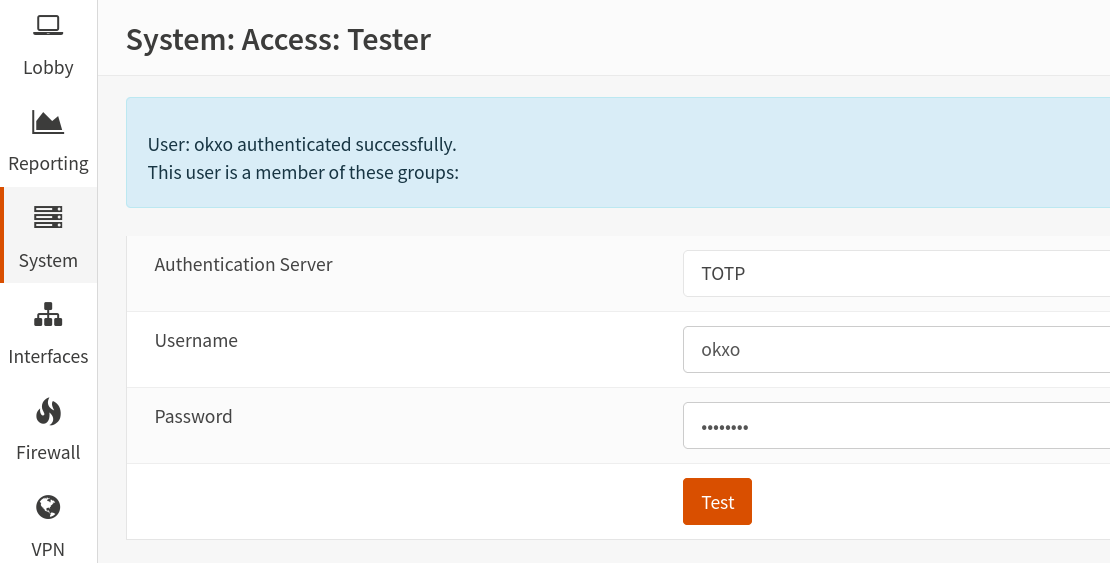
Tests if the user can log in successfully. The password is OTP token+user password (that's the reason why we chose a simple one).
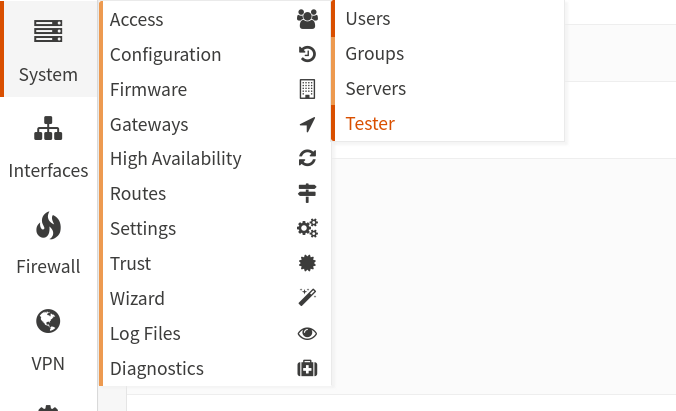
You can check this under System/Access/Tester.
NGINX Proxy Settings
Unfortunately, it is not enough to activate the second factor and that's it.
There are many pitfalls here. Unfortunately, the documentary is also silent.
I assume that the reverse proxy to Paperless NGX is already set up (if not, there are many instructions on the Internet).
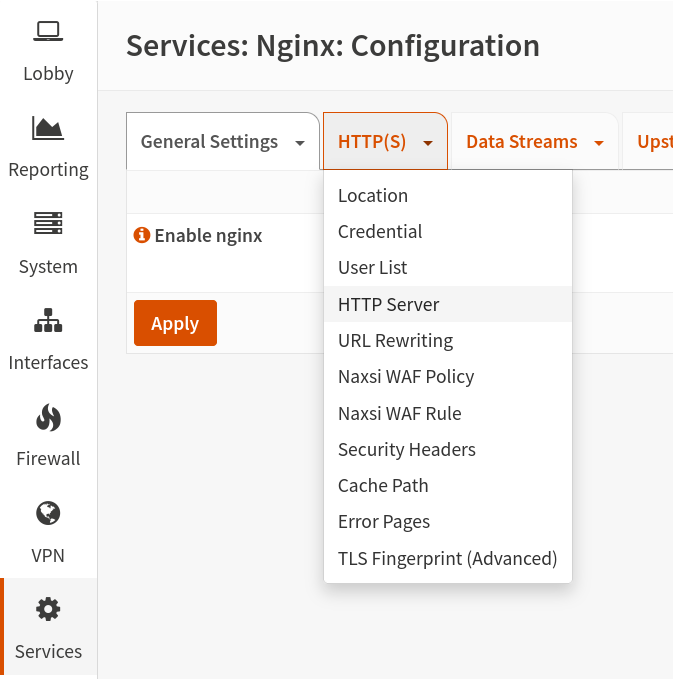
The required settings are made in the NGINX service.
Go to the HTTP(s) tab click on the Location menu item.
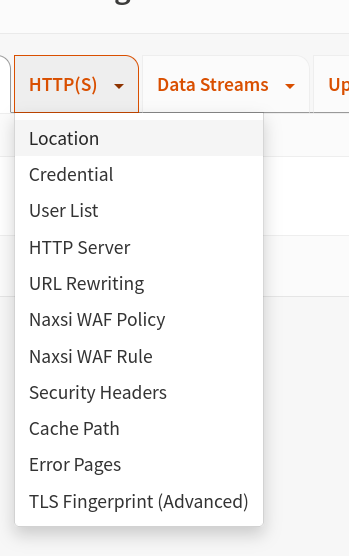
We need to create a separate location for each path we want to protect.
Configuring the protection to the root directory "/" would lead to the fact that you can enter the second factor, but this would also be sent to the backend as a POST request and you would constantly log in with the wrong user data.
With Paperless-ngx we only protect the login paths.
These are with Paperless-ngx:
- /api/auth/login/
- /accounts/login/
We now need to configure the following "locations" settings:
- location (Paperless API login)
- URL Pattern: /api/auth/login/
- Match type: Exact Math ("=")
- Upstream: YourPaperless-ngx-Upstream
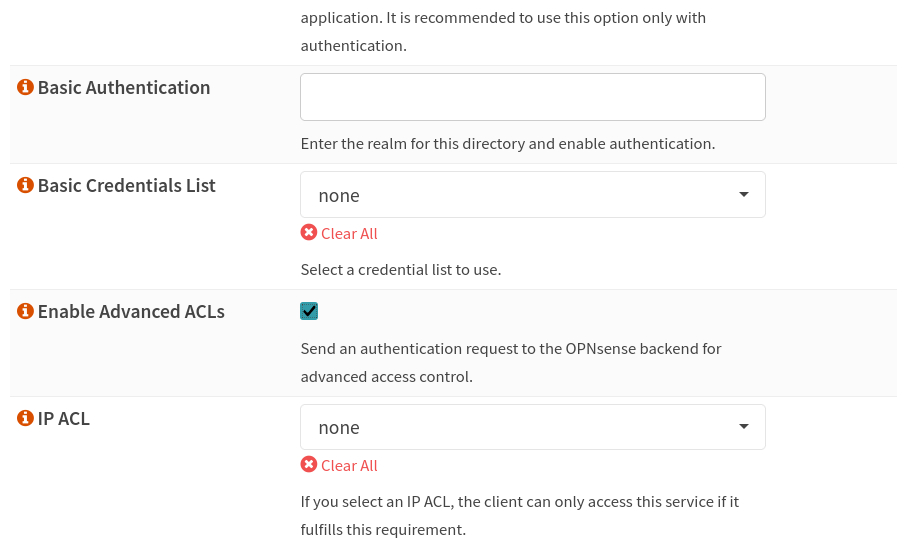
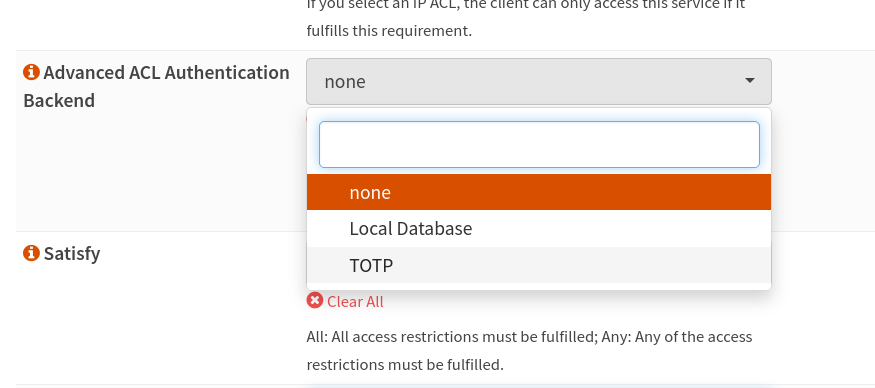
- Enable Advanced ACLs [X] - location (Paperless Accounts login)
- URL Pattern: /accounts/login/
- Match type: Exact Match ("=")
- Upstream: YourPaperless-ngx-Upstream
- Enable Advanced ACLs [X] - location (Paperless root)
- URL Pattern: /
- Match type: Don't check regular expressions on logest prefix match ("^~")
- Upstream: YourPaperless-ngx-Upstream
- Do NOT set Advanced ACLs
Explanation:
Advanced ACLS makes the second factor possible for this path. But for the "default" path / we do not want that.
The matching rules result from the fact that NGINX always gives priority to the most accurate path.
We are not done yet because the HTTP server does not know anything yet.Go to the server settings for your Paperless-ngx web server under HTTP Server.
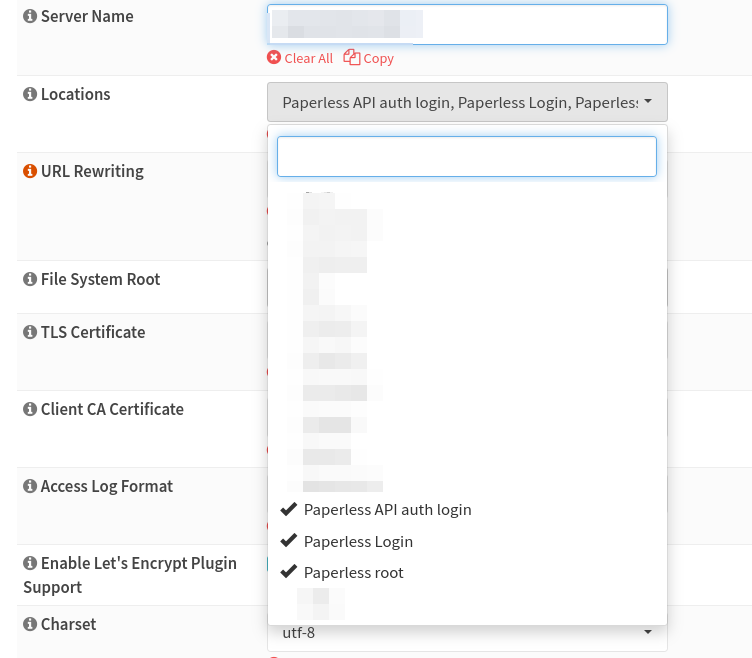
Now enable the second factor for the web server as well:
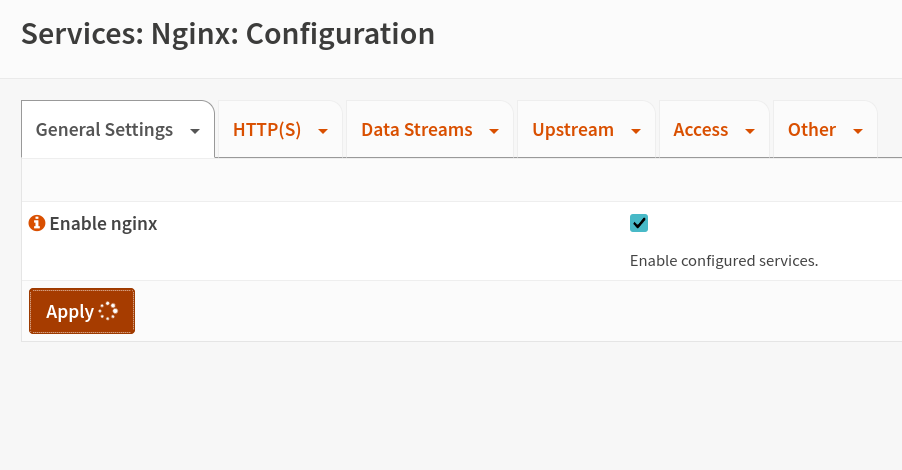
You can save the settings by clicking on "Apply" in the main view.
From now on, every time you open your Paperless-ngx page on the Internet, the username and password will be displayed additionally before the actual user login.
This is a huge security gain.