
Secure your Docker passwords with Hashicorp Vault and Ansible (Part 2: Automate Docker startup with Ansible)
This is the second part of a two-part series on securing Docker passwords. Using Authelia as an example, I show how to automate the container start.
If you already have Authelia you can choose another container service
Install Authelia
Unfortunately we had to install Hashicorp Vault as root user. Fortunately, this does not apply to Authelia. The setup of a rootless docker is now very easy with the command
dockerd-rootless-setuptool.sh install
possible.
Create your own user authelia without sudo privileges and log in to your server via SSH with this user. Since you need Systemd for rootless docker, it is not possible to start the docker socket with su - username or sudo -u username.
Authelia can be configured almost entirely via environment variables, with a few exceptions.
The only configuration file needed is for the rules. In part 1 we had already defined a few environment variables in the Hashicorp Vault. Now we want to use this configuration.
First, we log in to the Hashicorp Vault and populate these variables.
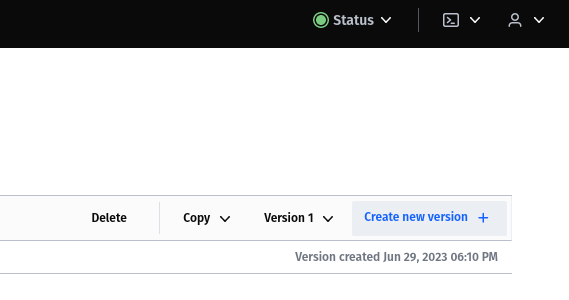
Log in to the Vault with your root token and choose the secret engine we have already created (in my case it was Authelia with the path secret). Then click on "Create new version".
All keys ending with key, secret, password, or token correspond to a secret. All others are configuration variables.
Shimmy through key by key. If you get stuck somewhere, you can also use less environment variables and use the instructions here where you will also find a script for generating the passwords for Authelia.
When you're done, click Save and you now have version 2 of your Secrets. Hashicorp Vault always stores a version history of your passwords.

Now create a new folder on your server with a docker-comopose.yml file:
version: "3.8"

services:
  redis:
    image: redis:alpine
    volumes:
      - ./redis:/data:Z
    ports:
      - 127.0.0.1:6380:6379
    command: /bin/sh -c "redis-server --requirepass \"$REDIS_HOST_PASSWORD\""
    environment:
      - REDIS_HOST_PASSWORD

  authelia:
    image: docker.io/authelia/authelia:latest
    ports:
      - 9091:9091
    environment:
      - AUTHELIA_NOTIFIER_SMTP_DISABLE_HTML_EMAILS
      - AUTHELIA_NOTIFIER_SMTP_DISABLE_REQUIRE_TLS
      - AUTHELIA_NOTIFIER_SMTP_HOST
      - AUTHELIA_NOTIFIER_SMTP_PASSWORD
      - AUTHELIA_NOTIFIER_SMTP_PORT
      - AUTHELIA_NOTIFIER_SMTP_SENDER
      - AUTHELIA_NOTIFIER_SMTP_SUBJECT
      - AUTHELIA_NOTIFIER_SMTP_USERNAME
      - AUTHELIA_JWT_SECRET
      - AUTHELIA_SESSION_SECRET
      - AUTHELIA_STORAGE_ENCRYPTION_KEY
      - AUTHELIA_STORAGE_LOCAL_PATH
      - AUTHELIA_ACCESS_CONTROL_DEFAULT_POLICY
      - AUTHELIA_SESSION_REDIS_HOST
      - AUTHELIA_SESSION_REDIS_PORT
      - AUTHELIA_SESSION_NAME
      - AUTHELIA_SESSION_DOMAIN
      - AUTHELIA_SESSION_EXPIRATION
      - AUTHELIA_SESSION_INACTIVITY
      - AUTHELIA_DEFAULT_REDIRECTION_URL
      - AUTHELIA_AUTHENTICATION_BACKEND_FILE_PATH
      - AUTHELIA_AUTHENTICATION_BACKEND_FILE_PASSWORD_ALGORITHM
      - AUTHELIA_AUTHENTICATION_BACKEND_FILE_PASSWORD_ITERATIONS
      - AUTHELIA_AUTHENTICATION_BACKEND_FILE_PASSWORD_SALT_LENGTH
      - AUTHELIA_AUTHENTICATION_BACKEND_FILE_PASSWORD_PARALLELISM
      - AUTHELIA_AUTHENTICATION_BACKEND_FILE_PASSWORD_MEMORY
      - AUTHELIA_AUTHENTICATION_BACKEND_PASSWORD_RESET_DISABLE
      - AUTHELIA_TOTP_ISSUER
      - AUTHELIA_TOTP_PERIOD
      - AUTHELIA_TOTP_SKEW
      - AUTHELIA_SESSION_REDIS_PASSWORD
      - STORAGE_PASSWORD
      - REDIS_HOST_PASSWORD

    volumes:
      - ./config:/config
      - ./log/authelia.log:/var/log/authelia/authelia.log
    depends_on:
      - redis
Create Authelia users with hashed passwords as described in the old manual and two folders config and redis.
But since we now configure almost everything via environment variables, we can slim down the configuration.yml considerably.
###############################################################
#                   Authelia configuration                    #
###############################################################

server:
  host: 0.0.0.0
  port: 9091

log:
  level: info
  format: text
  file_path: /var/log/authelia/authelia.log

access_control:
  rules:
    # Rules applied to everyone
    - domain:
        - "sub1.YOURDOMAIN"
        - "sub2.YOURDOMAIN"

      networks:
        - 192.168.1.0/24

regulation:
  max_retries: 5
  find_time: 30m
  ban_time: 1200m

theme: darkStarting the container manually with docker compose will not work now and in the future, because your system does not know the environment variables. For this we use Ansible.
Install Semaphore for Ansible
You can also encrypt with the ansible-vault command (please don't confuse it with Hashicorp Vault). Unfortunately, this is not suitable as a secret manager, because in case your password is compromised, an attacker would have all your passwords.
Since we don't want to log into the cli every time to start a container, we install the graphical tool Semaphore for Ansible for this purpose.
Semaphore
The installation of Semaphore is described straightforward in the official manual. Since we want to use Ansible on the guest system, I don't recommend installing the Docker version of Semaphore.
Create a new folder and user for Semaphore. Since we have installed Authelia Docker rootless mode, we don't need root permissions for Ansible, but it is still best practice to give it sudo rights.
usermod -aG sudo <ansibleUser>Since we do not want the Ansible user to enter a password for executing commands as an Authelia user, we still need to adjust the sudo settings for the Ansible user.
Open the sudo settings with the following command:
visudoand add:
<ansibleUser> ALL=(<autheliaUser>) NOPASSWD: ALLbelow the line starting with "%sudo".
Create a local Git repository
Semaphore requires a Git repository to manage local playbooks.
As an Ansible user, create a new folder semaphore.git:
mkdir semaphore.git
cd semaphore.git
git init --bare
cd ..
git clone semaphore.gitThe directory tree should now look like this:
.
├── semaphore
└── semaphore.git
Explanation: semaphore.git is the directory for your Git repository. The semaphore directory will contain the playbooks for Ansible.
i always recommend a dependency manager like python poetry, but you can also just install ansible via apt install ansible.
Other Python packages that are required are:
- hvac
- docker
- docker-compose
Install them each via python pip or poetry add.
Ansible role
Create an Ansible role:
~/semaphore$ ansible-galaxy init --init-path roles/ start_docker_container
- Role start_docker_container was created successfully
We need two Ansible collections:
- community.docker : for Docker Compose management
- community.hashi_vault : for fetching the secrets from the Hashicorop vault.
ansible-galaxy collection install community.hashi_vault
ansible-galaxy collection install community.docker
Ansible playbook
Create an Ansible playbook to launch the containers:
---
- hosts: localhost
  connection: local
  roles:
- role: start_docker_containerYour directory tree should now look like this:
.
├── roles
│   └── start_docker_container
│       ├── defaults
│       │   └── main.yml
│       ├── handlers
│       │   └── main.yml
│       ├── meta
│       │   └── main.yml
│       ├── README.md
│       ├── tasks
│       │   └── main.yml
│       ├── tests
│       │   ├── inventory
│       │   └── test.yml
│       └── vars
│           └── main.yml
└── start-docker-container.yml
Most of the files were created automatically and we need to customize them.
First open the file main.yml directory ~/semaphore/roles/start_docker_container/tasks
---
# tasks file for start_docker_container
- name: Login and use the resulting token
  community.hashi_vault.vault_login:
    url: "{{ vault_addr }}"
    auth_method: userpass
    username: "{{ vaultusername }}"
    password: "{{ vaultpassword }}"
  register: login_data
  no_log: true

- name: Read the latest version of a kv2 secret from Vault via the remote host with userpass auth
  community.hashi_vault.vault_kv2_get:
    url: "{{ vault_addr }}"
    engine_mount_point: "{{ engine_mount_point_authelia }}"
    path: "{{ vault_path_authelia }}"
    auth_method: userpass
    username: "{{ vaultusername }}"
    password: "{{ vaultpassword }}"
  register: response
  no_log: true
  tags:
    - authelia

- name: Prepare environment variables
  set_fact:
    env_map: "{{ env_map | default({}) | combine({item: response.data.data[item]}) }}"
  loop: "{{ env_vars_authelia }}"
  no_log: true

- name: Start Docker Compose with environment variables
  community.docker.docker_compose:
    project_src: "{{ project_src_authelia }}"
    docker_host: "{{ docker_host_authelia }}"
  environment: "{{ env_map }}"
  become: yes
become_user: "{{ become_user_authelia }}"Now adjust the file main.yml directory ~/semaphore/roles/start_docker_container/defaults
---
# defaults file for start_docker_container
    engine_mount_point_authelia: "authelia/"
    vault_path_authelia: "secret"
    project_src_authelia: <Path to your Authelia docker-compose.yml>
    become_user_authelia: <the user you are running authelia docker>
    docker_host_authelia: <Docker socket, mostly /run/user/$(id -u)>


    env_vars_authelia:
      - AUTHELIA_NOTIFIER_SMTP_DISABLE_HTML_EMAILS
      - AUTHELIA_NOTIFIER_SMTP_DISABLE_REQUIRE_TLS
      - AUTHELIA_NOTIFIER_SMTP_HOST
      - AUTHELIA_NOTIFIER_SMTP_PASSWORD
      - AUTHELIA_NOTIFIER_SMTP_PORT
      - AUTHELIA_NOTIFIER_SMTP_SENDER
      - AUTHELIA_NOTIFIER_SMTP_SUBJECT
      - AUTHELIA_NOTIFIER_SMTP_USERNAME
      - AUTHELIA_JWT_SECRET
      - AUTHELIA_SESSION_SECRET
      - AUTHELIA_STORAGE_ENCRYPTION_KEY
      - AUTHELIA_STORAGE_LOCAL_PATH
      - AUTHELIA_ACCESS_CONTROL_DEFAULT_POLICY
      - AUTHELIA_SESSION_REDIS_HOST
      - AUTHELIA_SESSION_REDIS_PORT
      - AUTHELIA_SESSION_NAME
      - AUTHELIA_SESSION_DOMAIN
      - AUTHELIA_SESSION_EXPIRATION
      - AUTHELIA_SESSION_INACTIVITY
      - AUTHELIA_DEFAULT_REDIRECTION_URL
      - AUTHELIA_AUTHENTICATION_BACKEND_FILE_PATH
      - AUTHELIA_AUTHENTICATION_BACKEND_FILE_PASSWORD_ALGORITHM
      - AUTHELIA_AUTHENTICATION_BACKEND_FILE_PASSWORD_ITERATIONS
      - AUTHELIA_AUTHENTICATION_BACKEND_FILE_PASSWORD_SALT_LENGTH
      - AUTHELIA_AUTHENTICATION_BACKEND_FILE_PASSWORD_PARALLELISM
      - AUTHELIA_AUTHENTICATION_BACKEND_FILE_PASSWORD_MEMORY
      - AUTHELIA_AUTHENTICATION_BACKEND_PASSWORD_RESET_DISABLE
      - AUTHELIA_TOTP_ISSUER
      - AUTHELIA_TOTP_PERIOD
      - AUTHELIA_TOTP_SKEW
      - AUTHELIA_SESSION_REDIS_PASSWORD
      - STORAGE_PASSWORD
- REDIS_HOST_PASSWORDDo these environment variables look familiar? They are the same as in the Vault and in the docker-compose file.
Ansible vault encryption
So far, however, the Ansible role does not know where and how to log into the Hashicorp Vault. Of course, we don't just store this login password in the script, but encrypt it with Ansible Vault.
We need three encoded parameters:
- vaultusername
- vaultpassword
- vault_addr
Encryption is done in each case using the ansible-vault encrypt_string 'YOURVAULTPASSWORD' --name vaultpassword command . Thus:
ansible-vault encrypt_string 'YOURVAULTUSERNAME' --name vaultuser
New Vault password:
Confirm New Vault password:
Encryption successful
vaultuser: !vault |
          $ANSIBLE_VAULT;1.1;AES256...

ansible-vault encrypt_string 'YOURVAULTPASSWORD' --name vaultpassword
ansible-vault encrypt_string 'YOURVAULTADRESS' --name vault_addrWith each input you get a new encrypted string, which you have to enter additionally into the defaults/main.yml of the role.
It is important that you always enter the same Vault password, otherwise the encryption result will differ. Of course, keep this password safe, e.g. in Keepass.
Once you have everything done, you still need to write changes to the local Git upstream:
git add .
git commit -am "init"
git pushSemaphore task
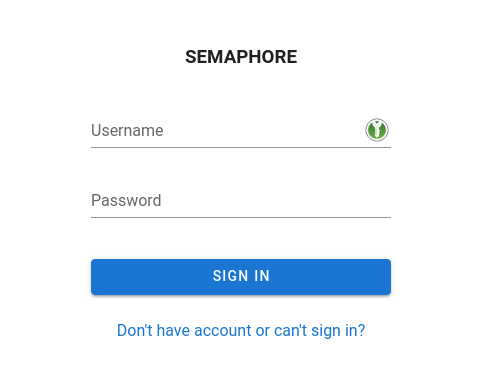
The default port for Semaphore is 3000, log in to the GUI.
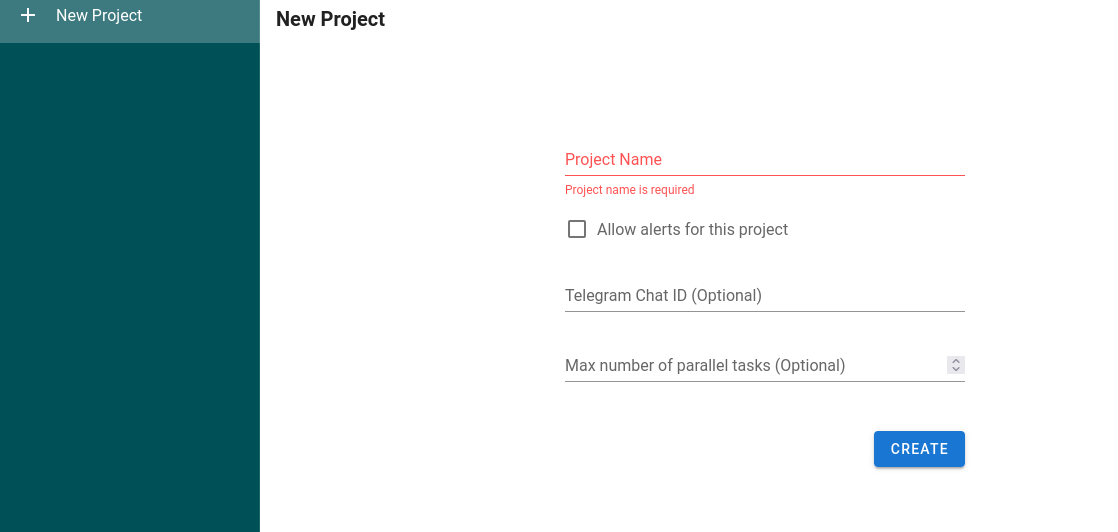
Create a new project.
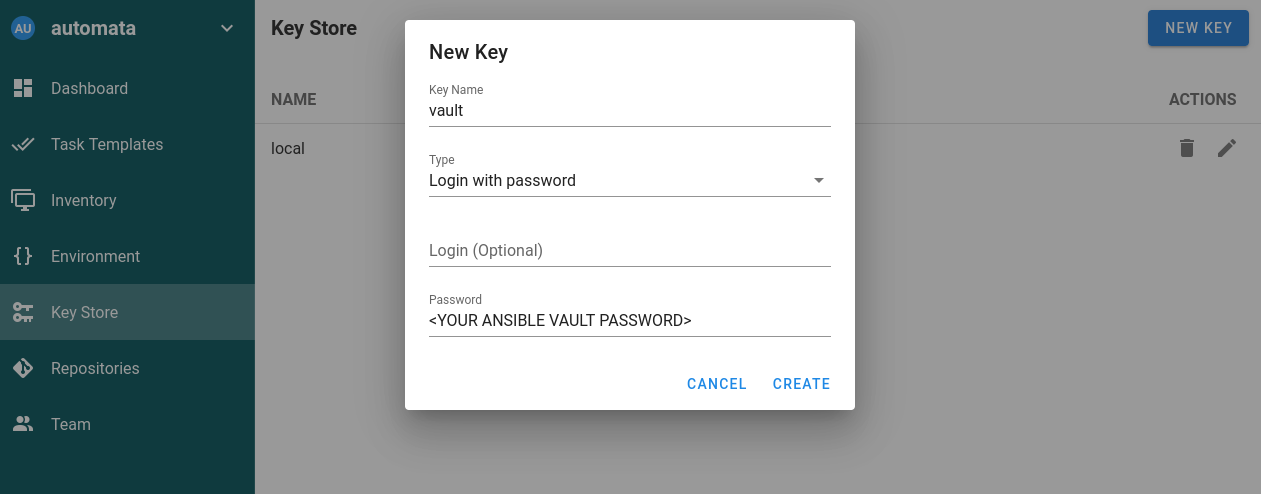
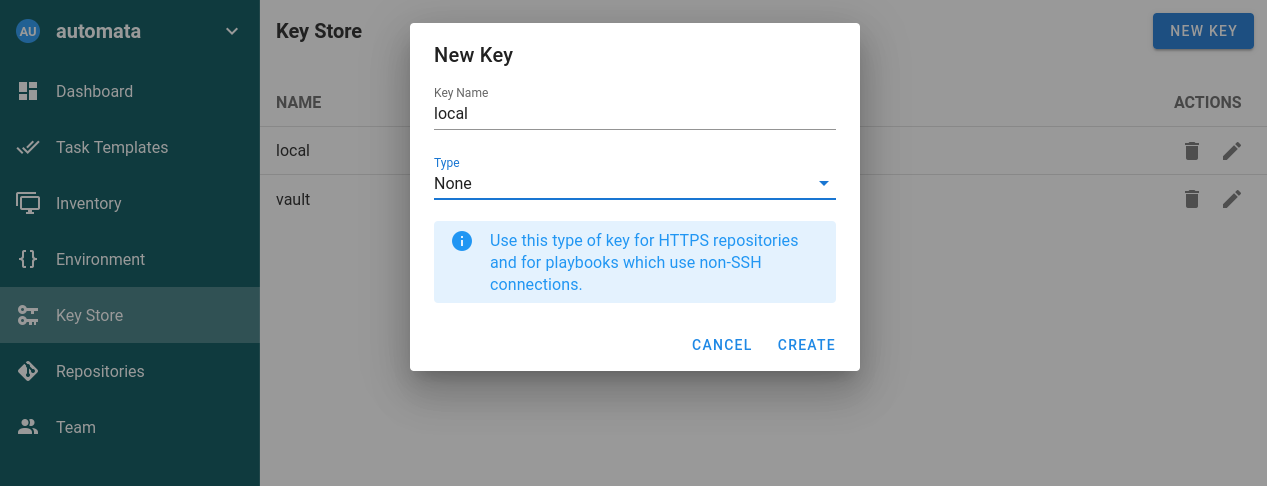
Add your vault key to the key store.
And create a local key without a password since semaphore wants authentication even on localhost.
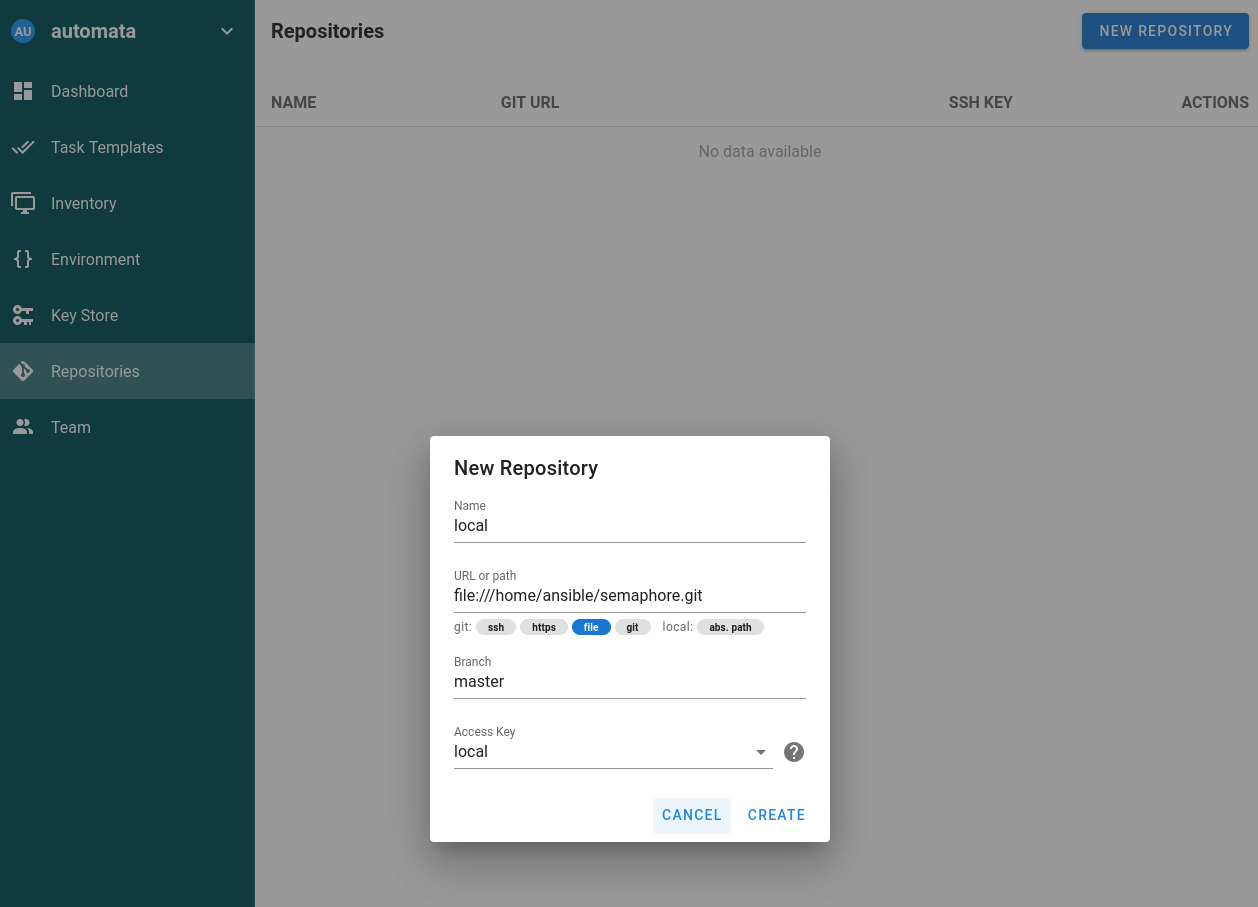
Add your created git upstream path as a new repository.
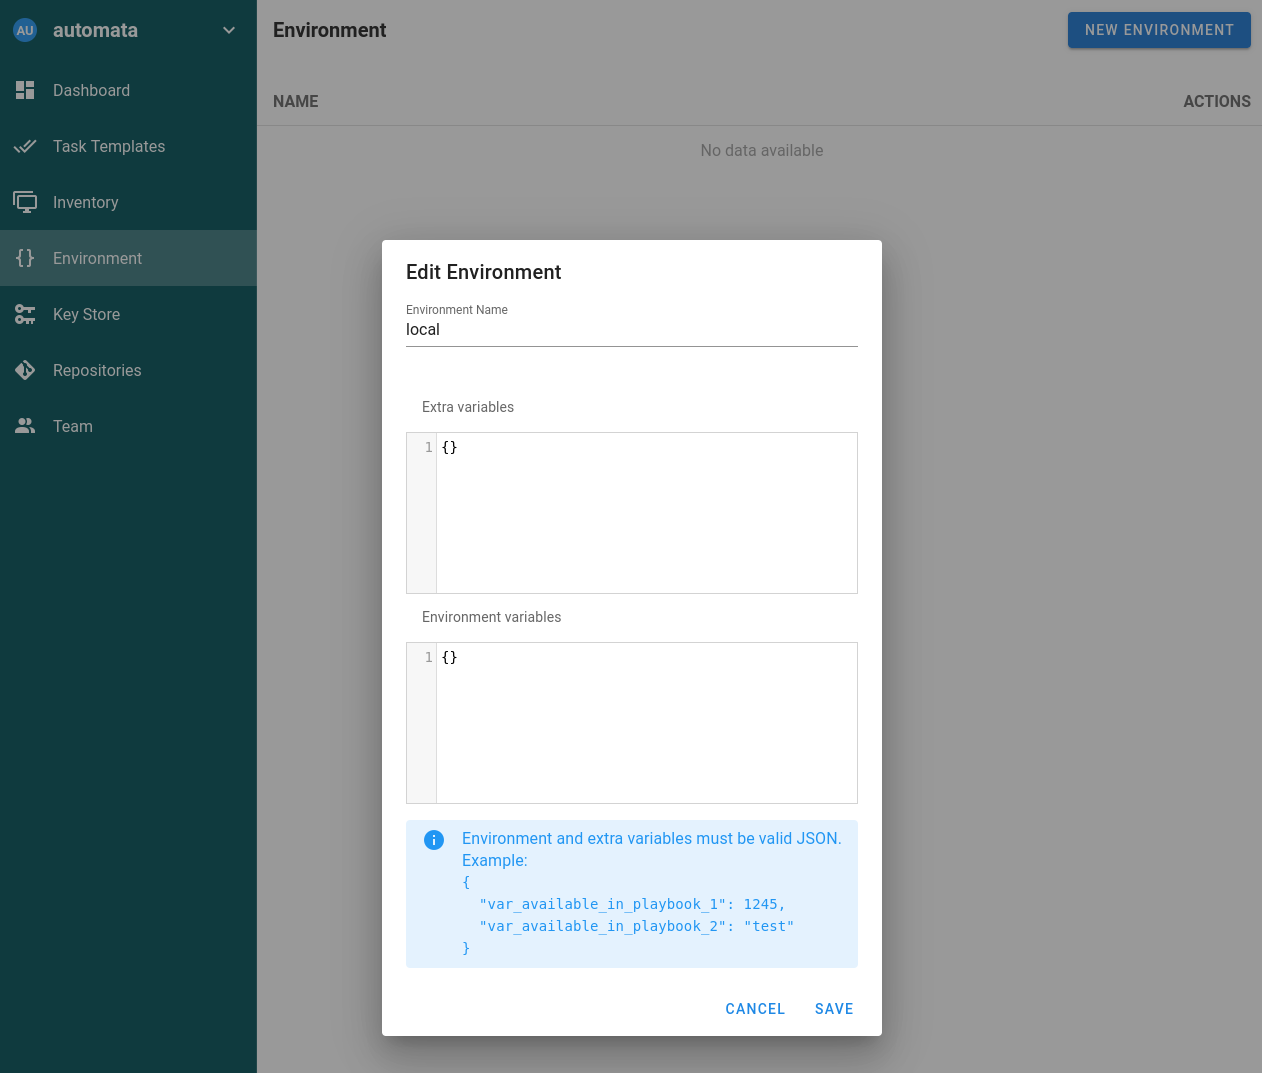
And add an empty environment file.
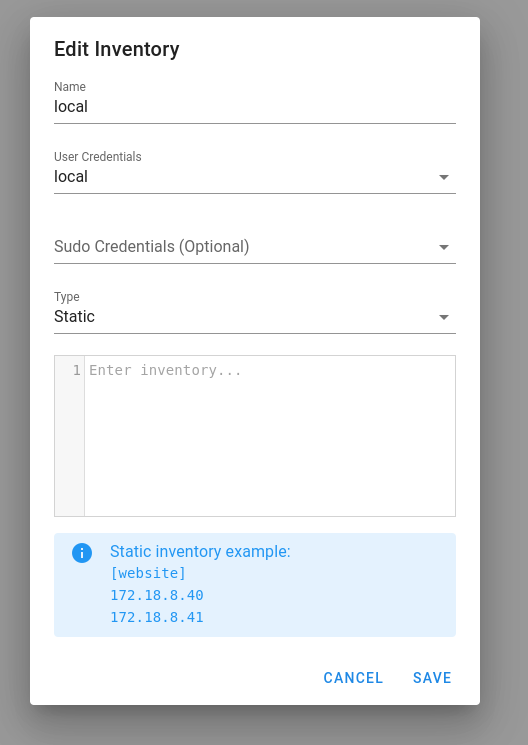
And another empty inventory file since we just want to work on localhost.
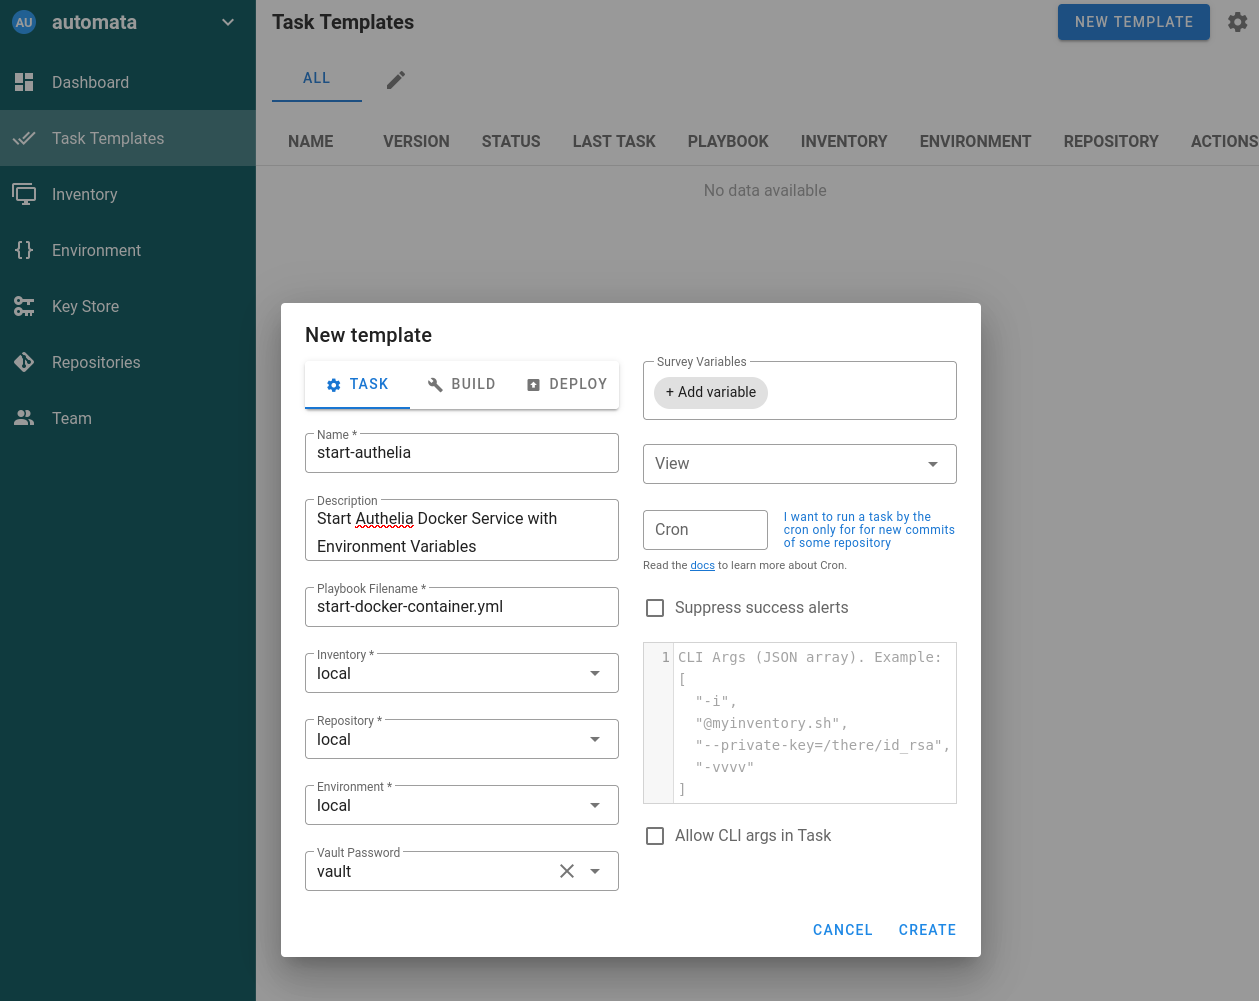
Now we go to the actual work. Semaphore works with task templates. The Ansible playbooks must be located in the root directory of the repostory. They will not be found in directories below that. This is in accordance with the Ansible defaults.
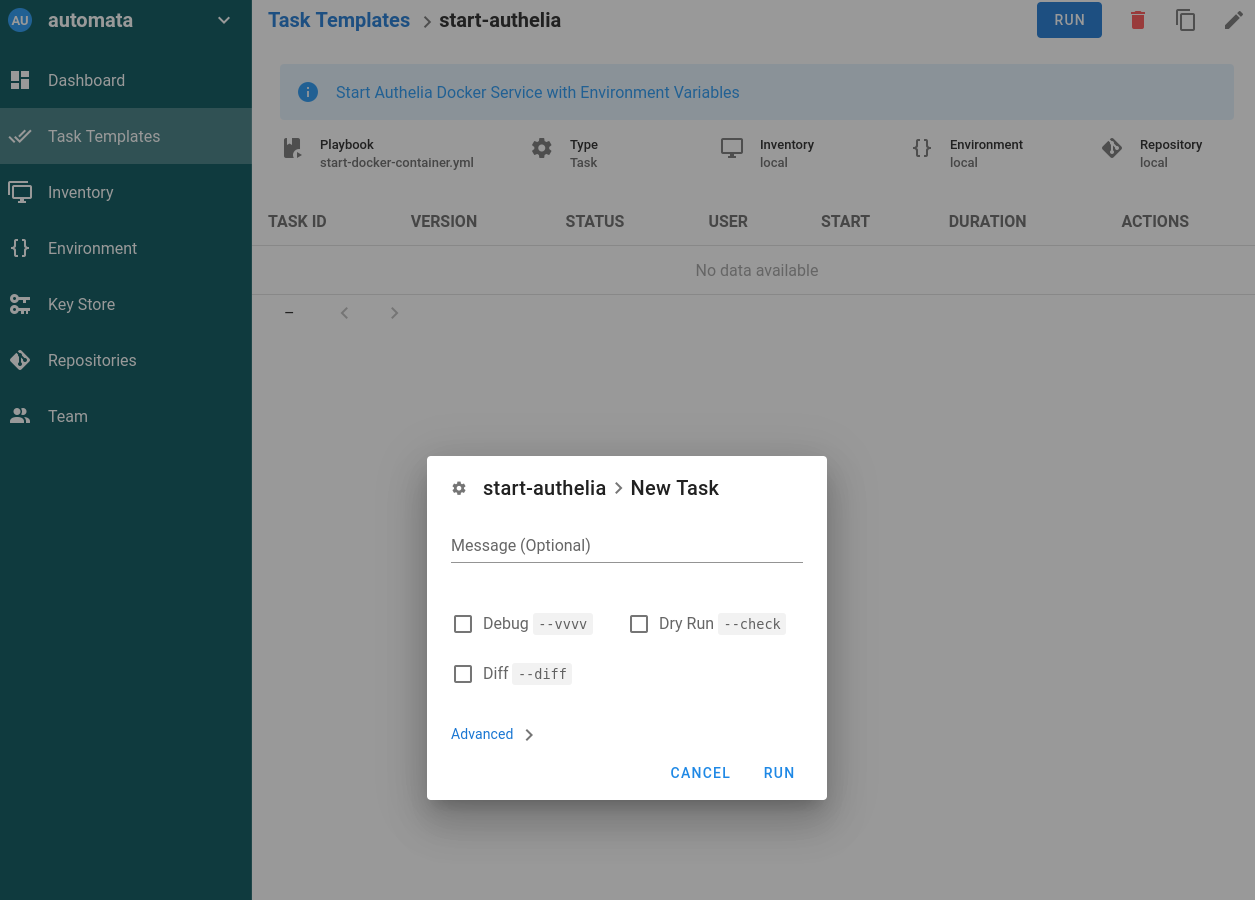
Start a task.
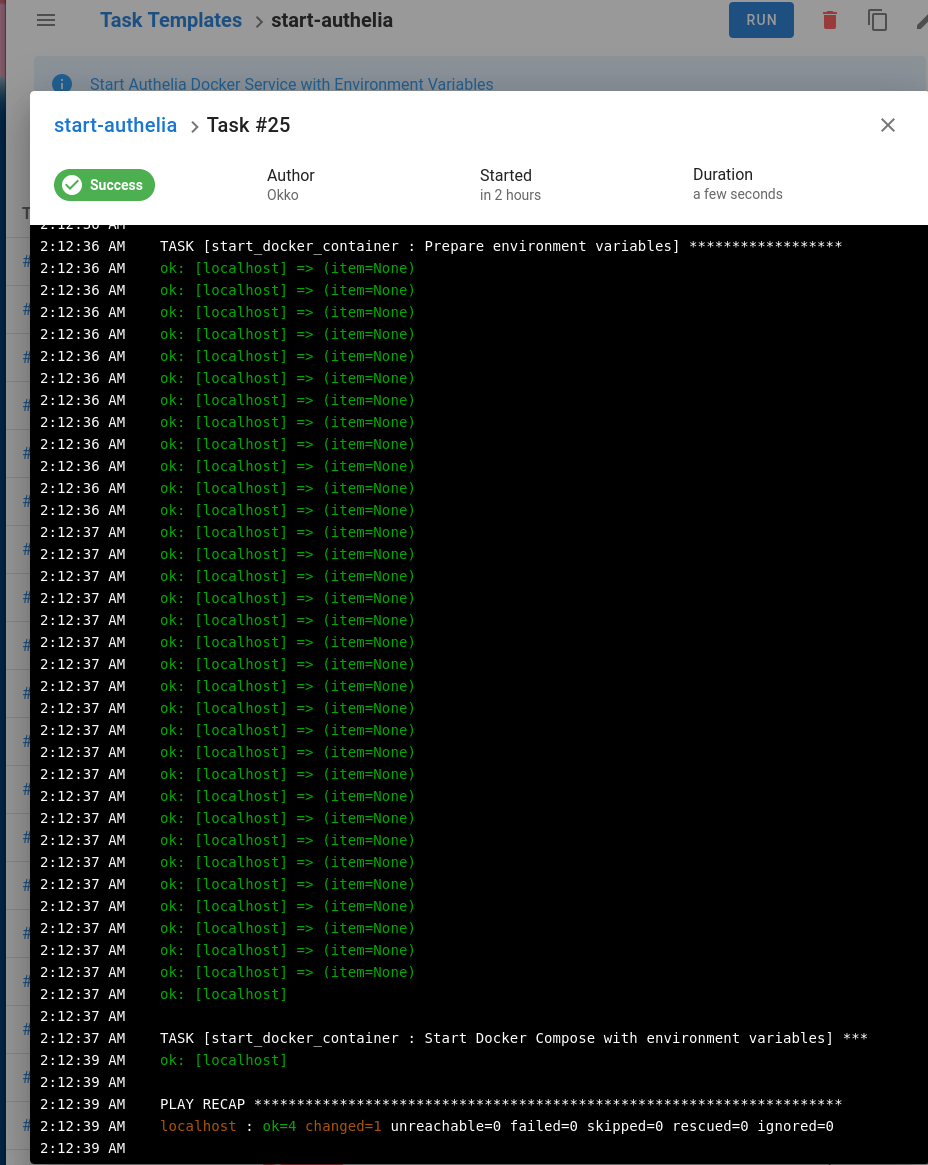
If everything goes well you will see a bright green.
How to add more containers
Basically, for each container, you just need to find the environment variables and set them in the Hashicorp Vault. You don't necessarily need to create a new secret engine for each user. The ACLs are fine-grained and very customizable.
You can extend the automation in Ansible with tags, e.g. docker1, docker2 and restrict the playscript with tags only to the container you want to launch.
A few caveats and why it doesn't matter
Every security measure comes at the expense of usability. This is also the case here. If your server reboots, you will have to unseal your vault every time.
The same applies to the Docker containers, if they should crash, they would no longer be able to be restarted without further action.
Automation with Ansible makes things easier. The admittedly somewhat odd approach with the local Git repository at Semaphore complicates this somewhat unnecessarily. If you change something in the playbooks, you have to commit and push the change to the directory first. But the Semaphore interface is just an icing on the cake and you don't have to rely on it.
The security of this system thrives on unsealing and sealing the Hashicorp Vault. If someone were to get your Ansible Vault password and gain your Authelia user's readonly access to the Hashicorp Vault, they would have nothing to gain if the Vault is sealed.
If your server or hard drive is lost, they could still get your passwords and secrets.
Of course, password protection alone is not enough to secure your system, but it is a guaranteed advantage against attackers.
At the end of the day, you always have to work and live in IT in a way that the attacker has already penetrated your system and is looking over your shoulder. In this case, however, it wouldn't do him any good.
Environment variables, as long as you have not stored them in a bashrc or similar, live only as long as a shell is open. In this case, it means that once the Ansible job is finished, the environment variables only live in the container in non-persistent memory. Since containers are inherently immutable, they disappear when the container is restarted.