Secure your Docker passwords with Hashicorp Vault and Ansible (Part 1: Configure Hashicorp Vault)
This is the first part of a two-part series on container password storage.
Dealing with passwords is hard. While it is possible to transfer passwords to environment variables in the Docker run statement or to the Docker container via secret mounts, all this is useless if an attacker manages to break out of the container. Especially when a container is running as root, which is inevitable for some images, you can just as well hardcode the password.
The Secret Manager Hashicorp Vault allows to securely store and read passwords via its comprehensive API. As the name suggests, it can help replace compromised passwords quickly.
Overview
- In the first part we will deal with installing Hashicorp Vault.
- The second part is about configuring a container with environment variables coming from Vault. We use Authelia as an example of such a configuration. After that we see how to automate the whole thing with Ansible.
None of the software we use here is priced at all.
What is not explained in detail is the installation and configuration of a reverse proxy.
The installation of Authelia and the creation of the Secrets I have already explained here, so this tutorial is only expanded.
It is not necessary to know Ansible. We use the graphical tool Semaphore. For this you should be familiar with Git.
Hashicorp Vault
Hashicorp Vault is a secret manager that can securely store server passwords and make them accessible.
Every API call to Vault must be performed with a valid client token. Client tokens can be obtained with the Vault token passed in the HTTP request to Vault, or by requesting a new token using various authentication methods.
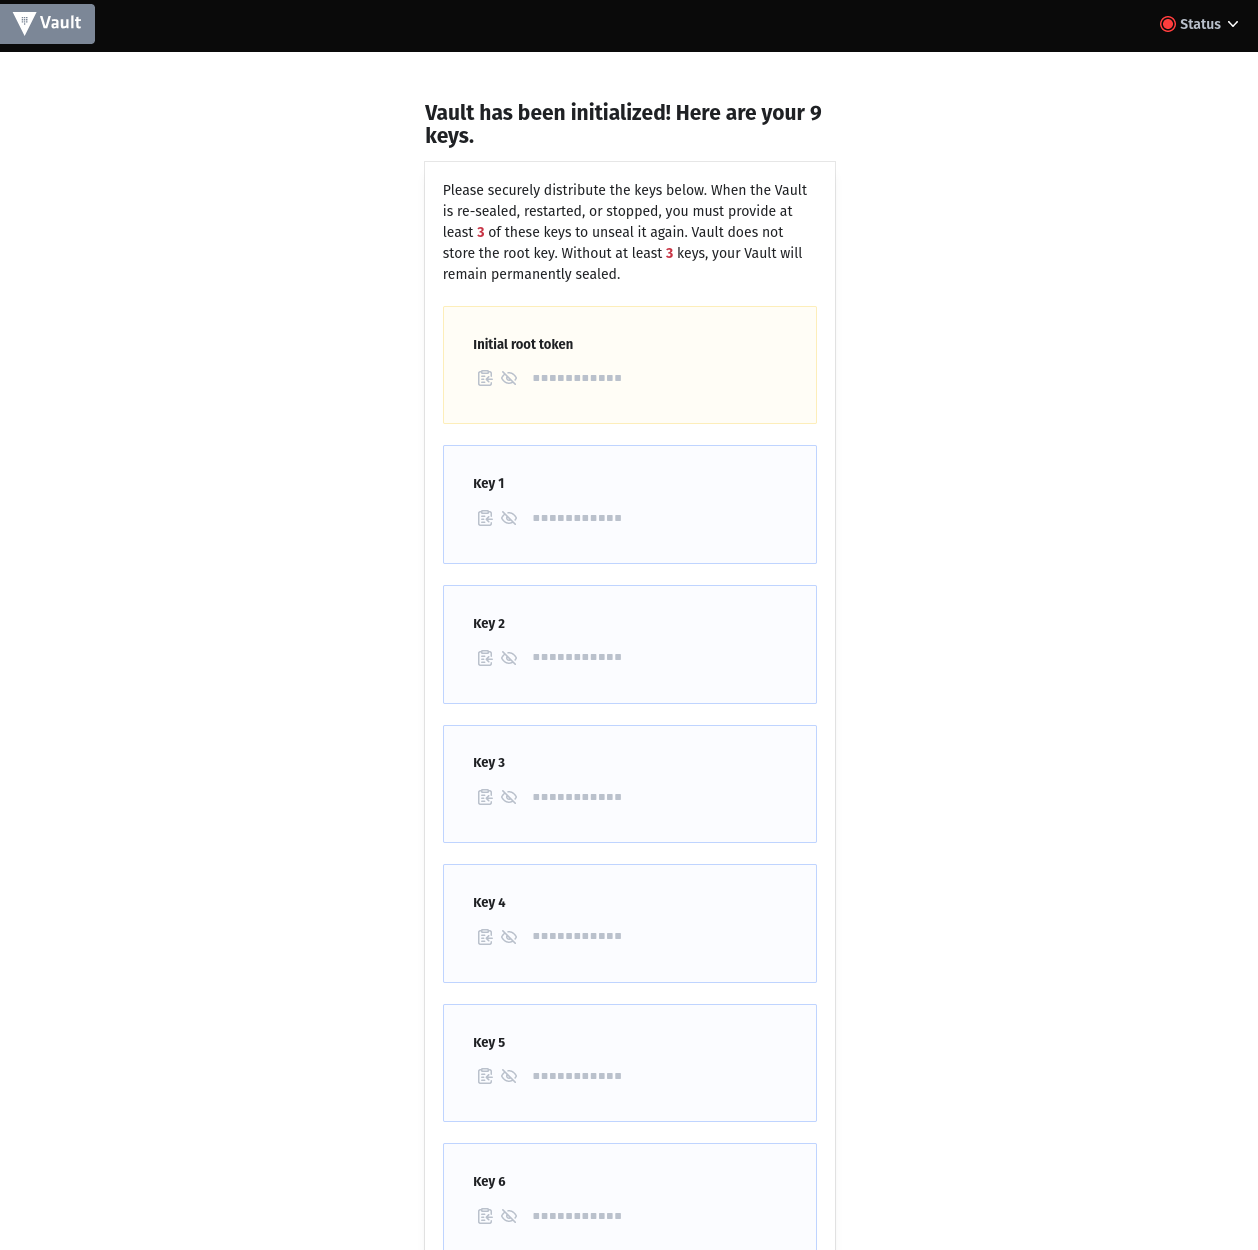
HashiCorp Vault employs a process called "Shamir's Secret Sharing" to secure the unsealing process. It's a method for splitting a secret (in this case, the master key) into multiple parts so that a certain number of these parts (the "threshold") is required to reconstruct the original secret.
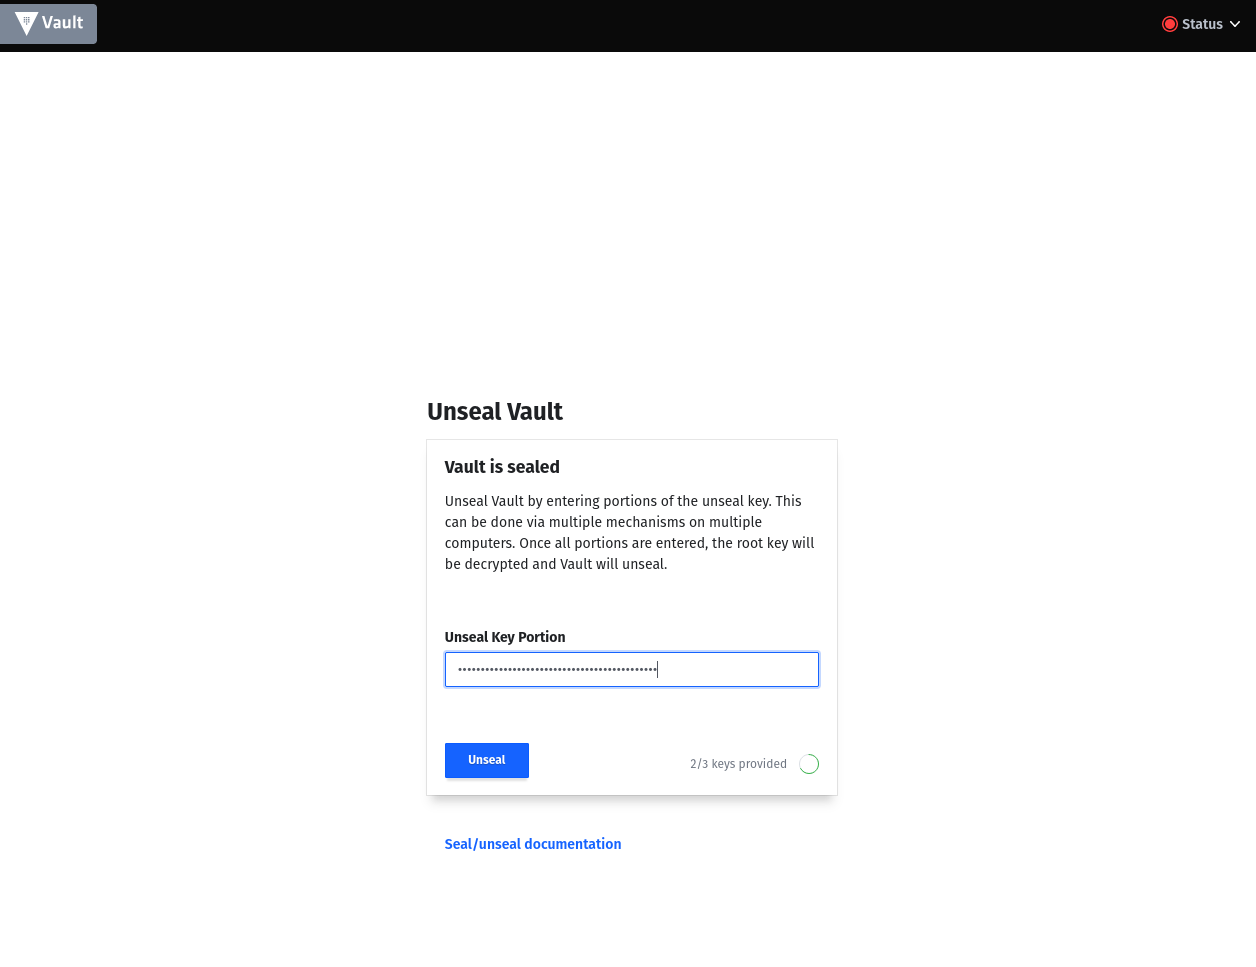
As long as the Vault is not unsealed, you can not access the secrets even with valid authentication tokens.
Installation
Hashicorp Vault's Docker container is one of the few that cannot be installed without effort and opening more security holes without root.
As root, create a folder vault and create a file config.hcl and folder vault_data in it.
Paste the following in your config.hcl.
storage "file" {
  path = "/vault/data"
}

listener "tcp" {
  address     = "0.0.0.0:8200"
  tls_disable = 1
}

default_lease_ttl = "168h"
max_lease_ttl     = "720h"
api_addr          = "http://0.0.0.0:8200"
ui = 1If you get the idea to change the IP from 0.0.0.0 to localhost: don't do it! localhost in the Docker container is not accessible for your host system.
Vault starts inside the container with the Vault user with the UID 100 and the GID 1000. In order for the Vault user on vault_data to be able to access the data directory vault_data, you must pass ownership to it:
chown -R 100:1000 vault_dataAfter that you create the docker-compose.yml with the following content:
version: '3.1'
services:
  vault:
    image: vault
    container_name: hashicorp/vault:latest
    ports:
      - "8200:8200"
      # Change this to the following if you have reverse proxy setup
      #- "127.0.0.1:8200:8200"
    volumes:
      - ./config.hcl:/vault/config/config.hcl:ro
      - ./vault_data:/vault/data
    cap_add:
      - IPC_LOCK
    command: server
    environment:
      - TZ=Europe/Berlin
    restart: always
The file tree should now look like this:
.
├── config.hcl
├── docker-compose.yml
└── vault_data
Start the container with docker compose up -d and access the GUI via port 8200.
Configuration
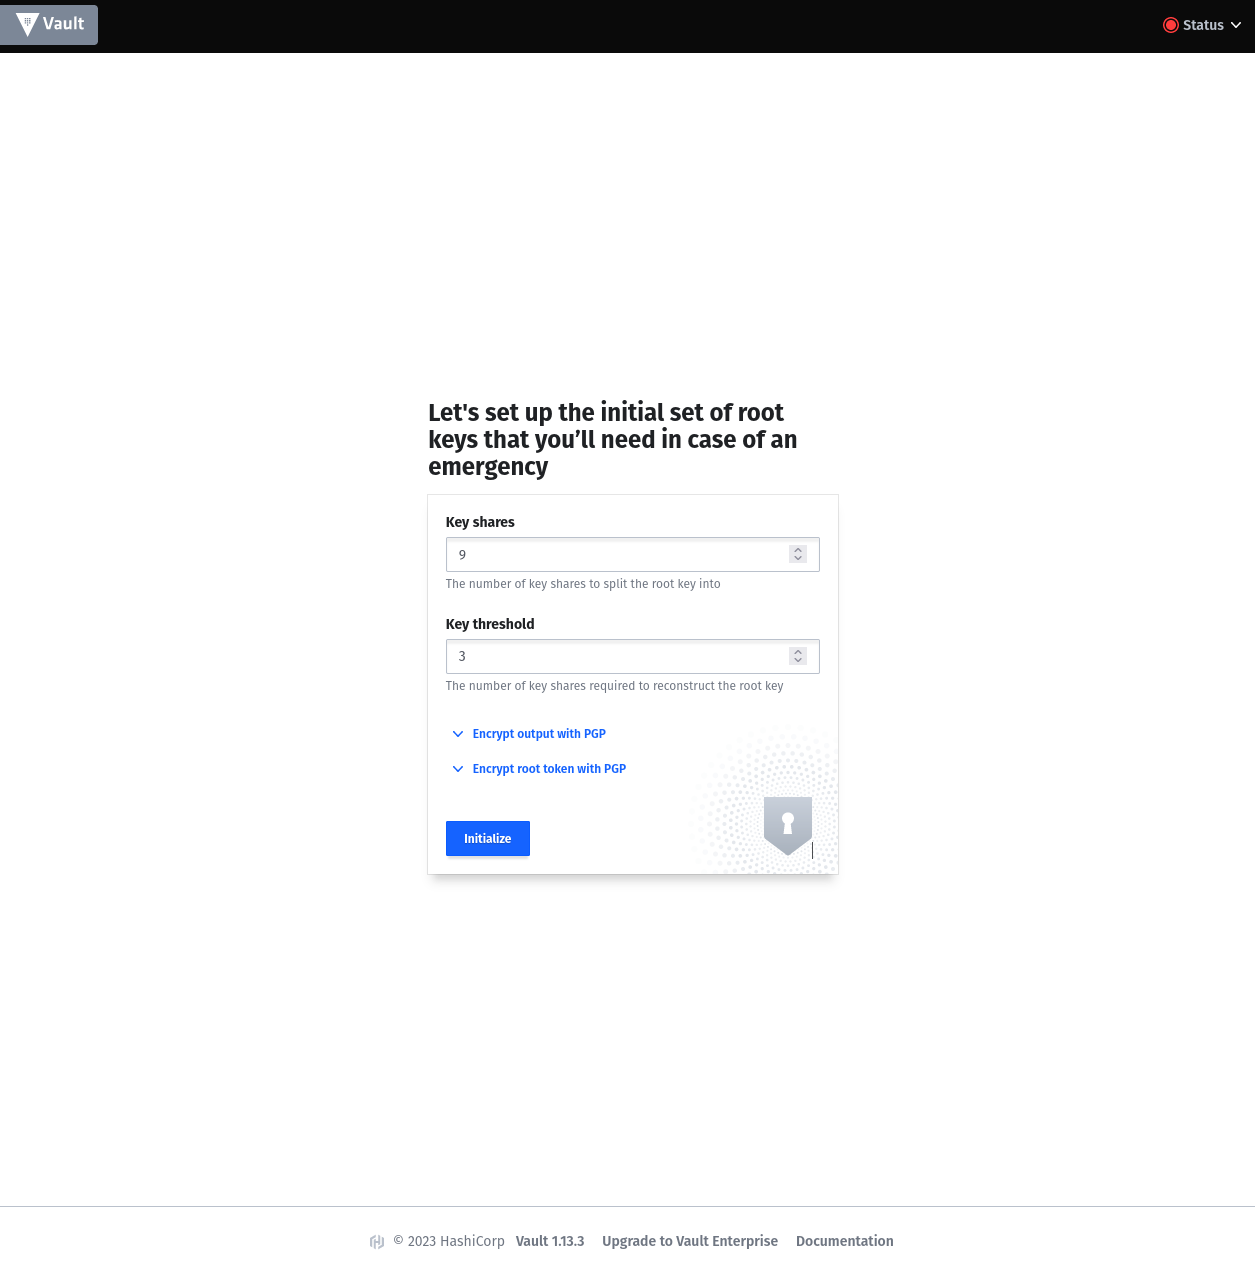
Create root and unseal token
At the first call of the GUI you will be asked how many part tokens you want to create and how many are necessary for unsealing. Store the unseal token and the root key securely (e.g. in Keepass).
Your Vault is still in sealed state. In the next step you will be asked for the number of unseal keys you specified and then for the root key.

If for some reason something didn't work, you can start over by stopping the container and emptying the vault_data directory.
Create secret engine
If everything worked, you can log in with the root token.

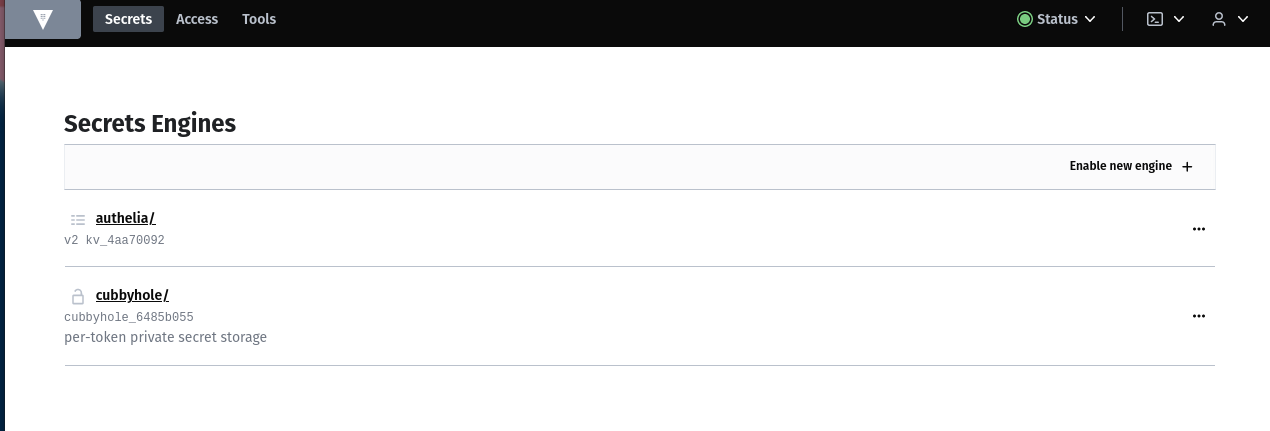
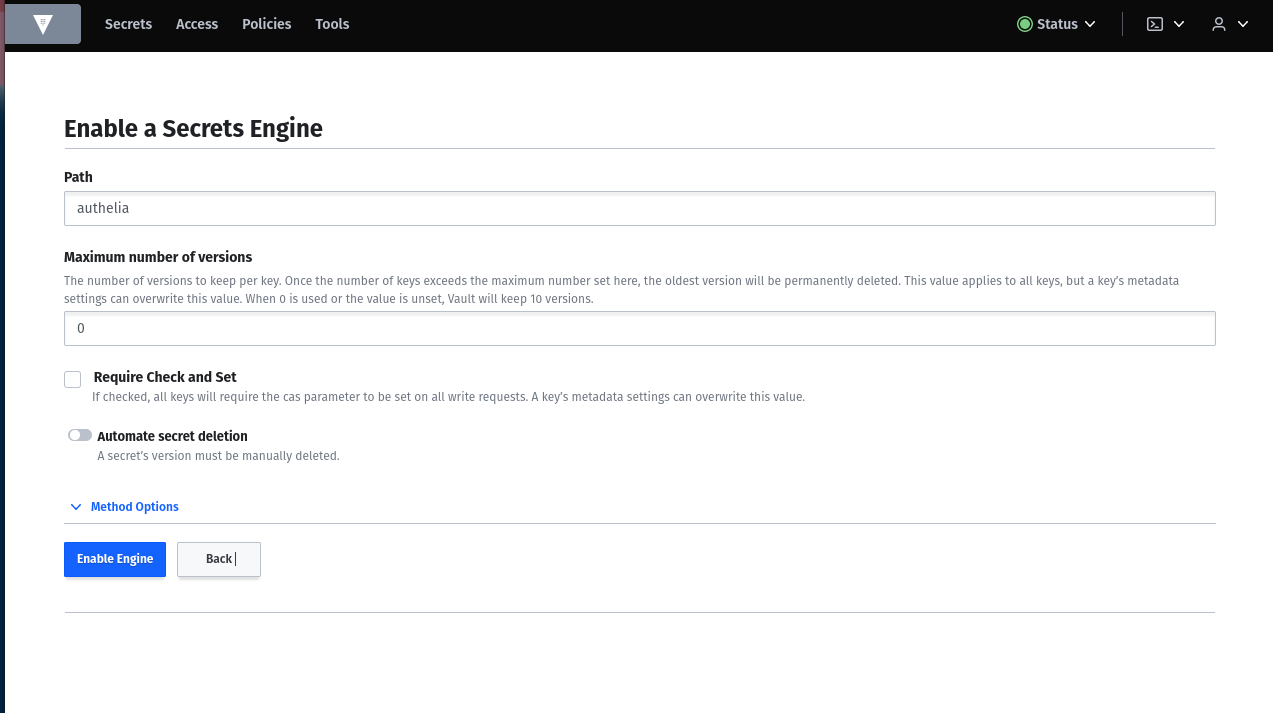
Enable a secret engine KV for key value secrets.
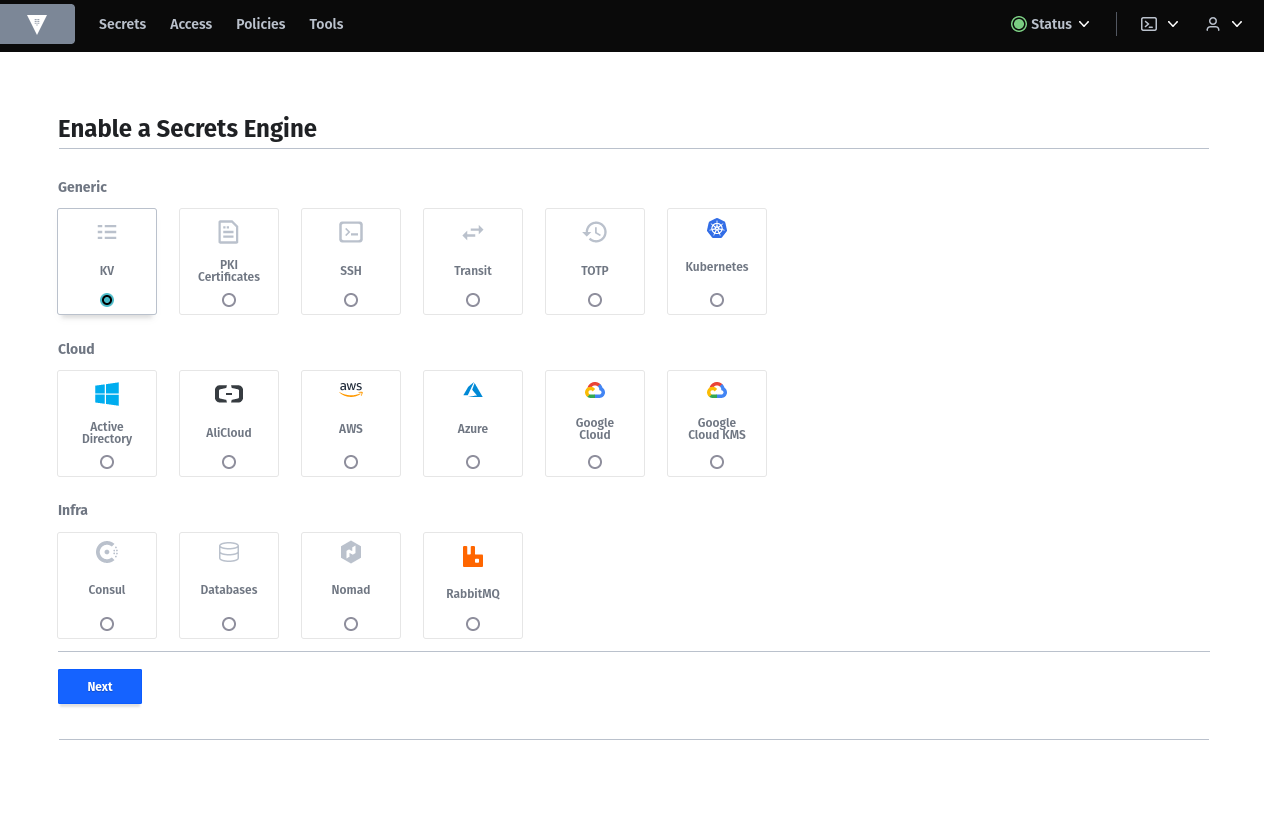
I named it authelia because I want to use this for the authelia container. You can create as many secret engines as you want.
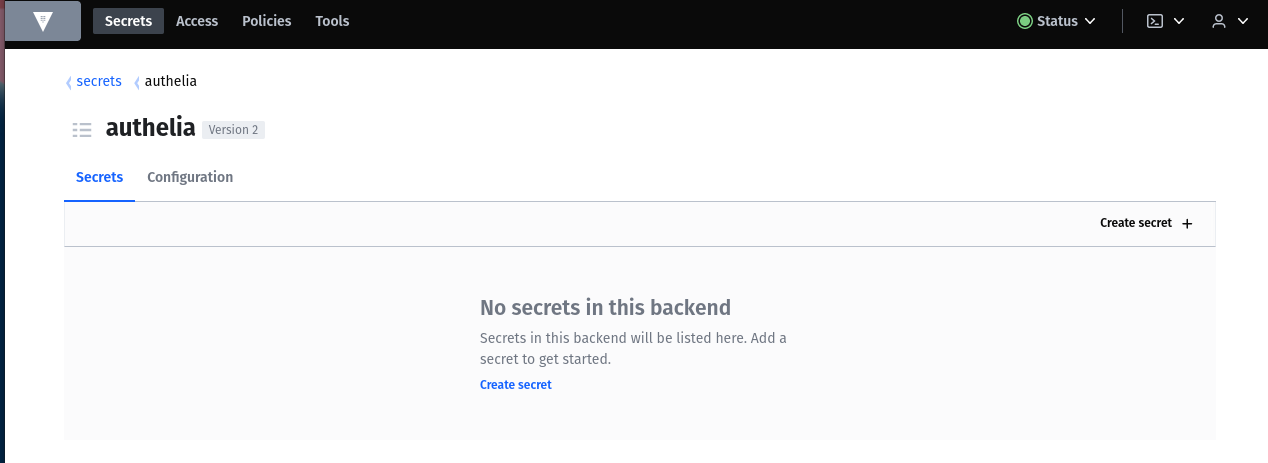
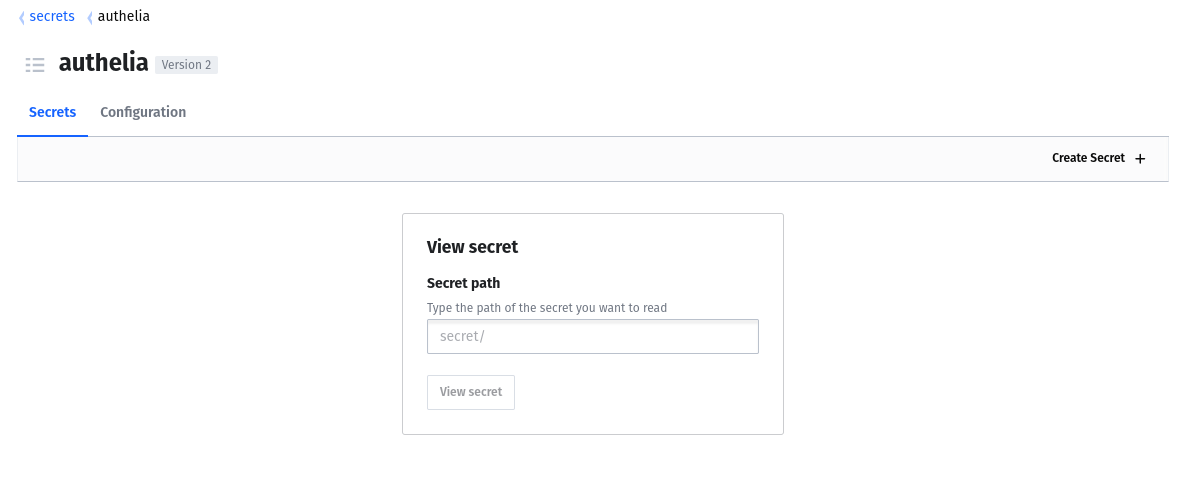
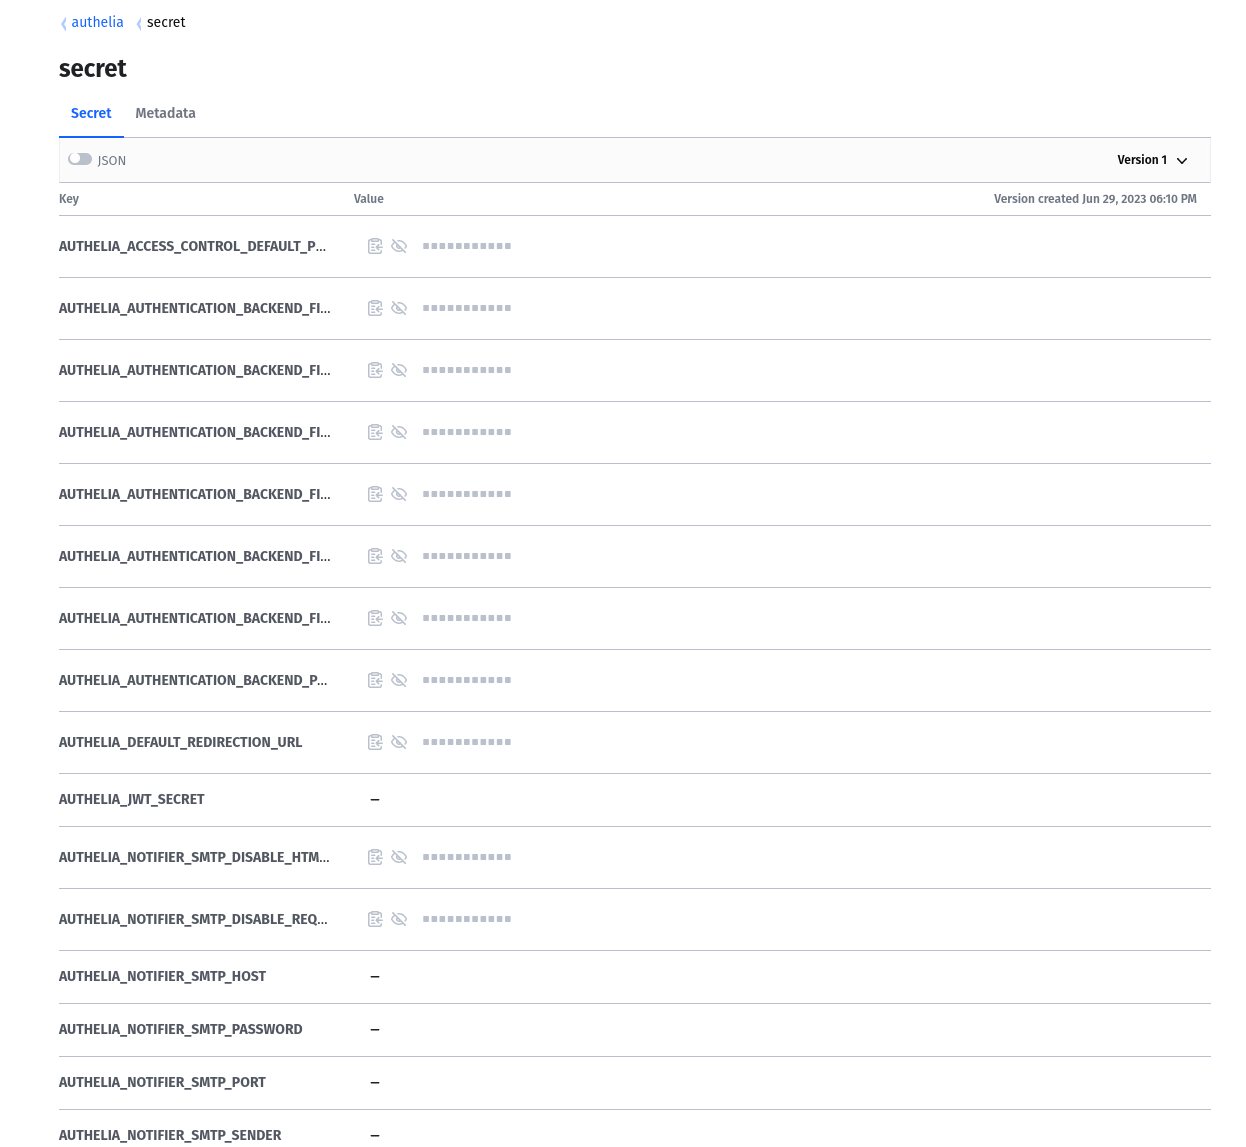
Add secrets
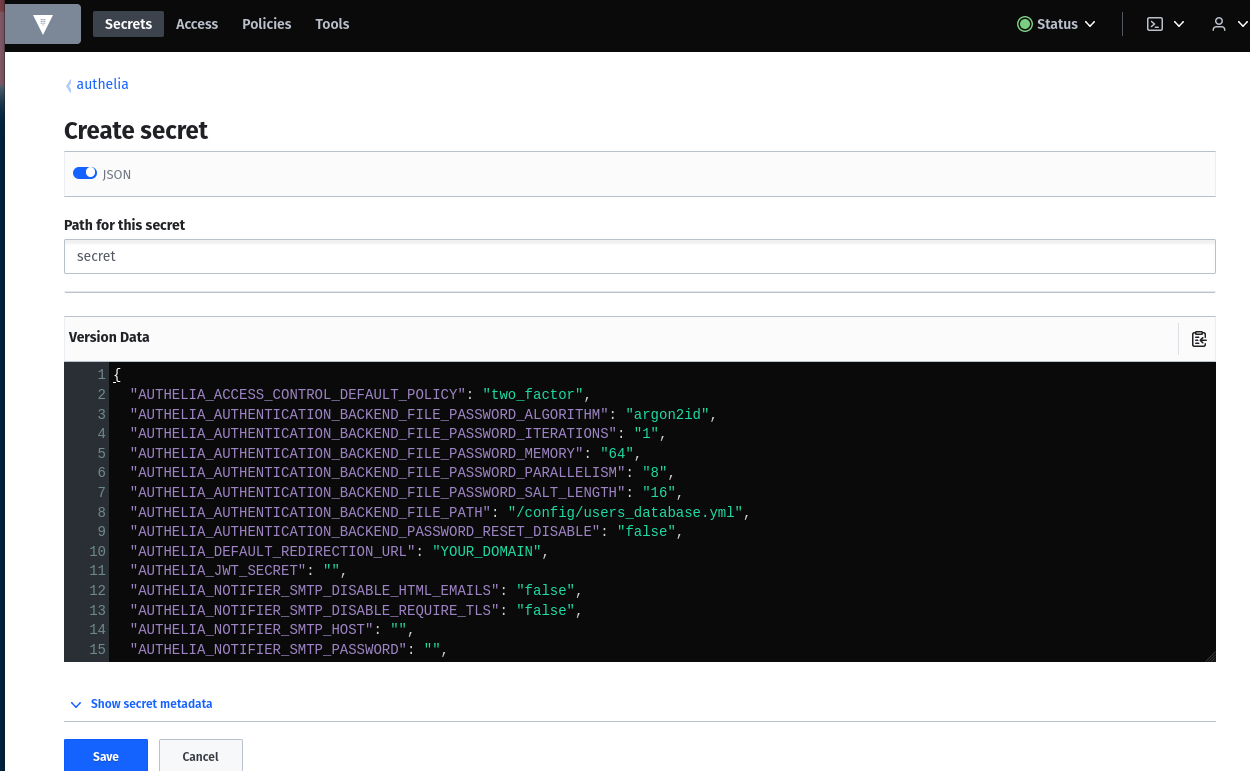
A secret in the Vault is stored in a secret engine plus path. In the next step we enter the path "secret" as an example.
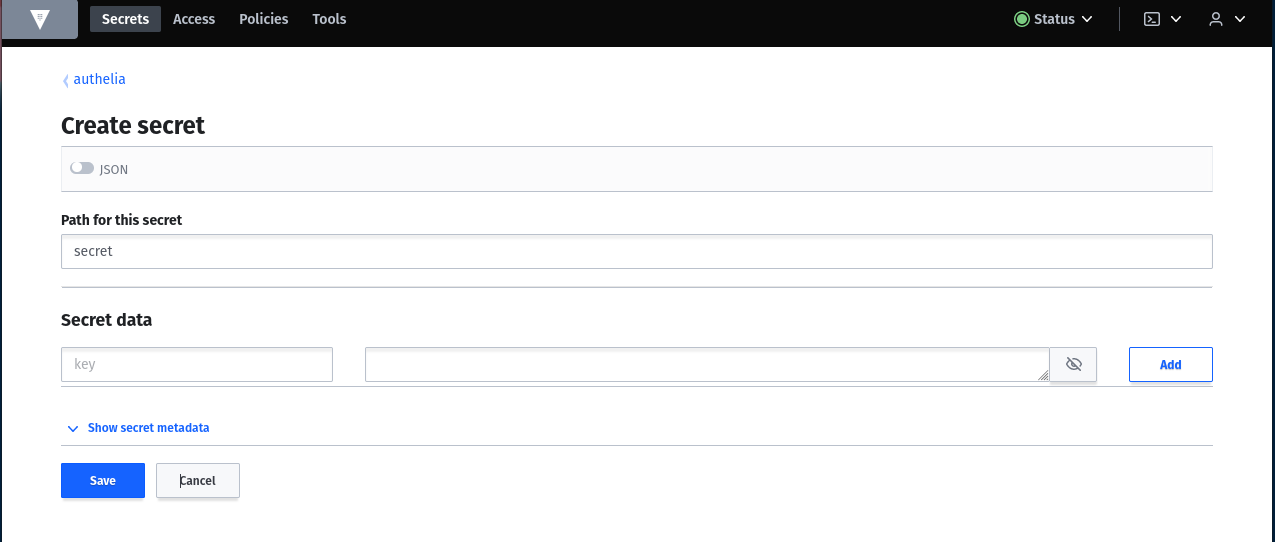
Since we want to write many key value pairs at once, change the input mask to JSON and add the following fields (this will be adjusted later):
{
  "AUTHELIA_ACCESS_CONTROL_DEFAULT_POLICY": "two_factor",
  "AUTHELIA_AUTHENTICATION_BACKEND_FILE_PASSWORD_ALGORITHM": "argon2id",
  "AUTHELIA_AUTHENTICATION_BACKEND_FILE_PASSWORD_ITERATIONS": "1",
  "AUTHELIA_AUTHENTICATION_BACKEND_FILE_PASSWORD_MEMORY": "64",
  "AUTHELIA_AUTHENTICATION_BACKEND_FILE_PASSWORD_PARALLELISM": "8",
  "AUTHELIA_AUTHENTICATION_BACKEND_FILE_PASSWORD_SALT_LENGTH": "16",
  "AUTHELIA_AUTHENTICATION_BACKEND_FILE_PATH": "/config/users_database.yml",
  "AUTHELIA_AUTHENTICATION_BACKEND_PASSWORD_RESET_DISABLE": "false",
  "AUTHELIA_DEFAULT_REDIRECTION_URL": "YOUR_DOMAIN",
  "AUTHELIA_JWT_SECRET": "",
  "AUTHELIA_NOTIFIER_SMTP_DISABLE_HTML_EMAILS": "false",
  "AUTHELIA_NOTIFIER_SMTP_DISABLE_REQUIRE_TLS": "false",
  "AUTHELIA_NOTIFIER_SMTP_HOST": "",
  "AUTHELIA_NOTIFIER_SMTP_PASSWORD": "",
  "AUTHELIA_NOTIFIER_SMTP_PORT": "",
  "AUTHELIA_NOTIFIER_SMTP_SENDER": "",
  "AUTHELIA_NOTIFIER_SMTP_SUBJECT": "[Authelia] {title}",
  "AUTHELIA_NOTIFIER_SMTP_USERNAME": "",
  "AUTHELIA_SESSION_DOMAIN": "",
  "AUTHELIA_SESSION_EXPIRATION": "3600",
  "AUTHELIA_SESSION_INACTIVITY": "7200",
  "AUTHELIA_SESSION_NAME": "authelia_session",
  "AUTHELIA_SESSION_REDIS_HOST": "authelia_redis_1",
  "AUTHELIA_SESSION_REDIS_PASSWORD": "",
  "AUTHELIA_SESSION_REDIS_PORT": "6379",
  "AUTHELIA_SESSION_SECRET": "",
  "AUTHELIA_STORAGE_ENCRYPTION_KEY": "",
  "AUTHELIA_STORAGE_LOCAL_PATH": "/config/authelia.db",
  "AUTHELIA_TOTP_ISSUER": "YOUR_DOMAIN",
  "AUTHELIA_TOTP_PERIOD": "30",
  "AUTHELIA_TOTP_SKEW": "1",
  "REDIS_HOST_PASSWORD": "",
  "STORAGE_PASSWORD": ""
}
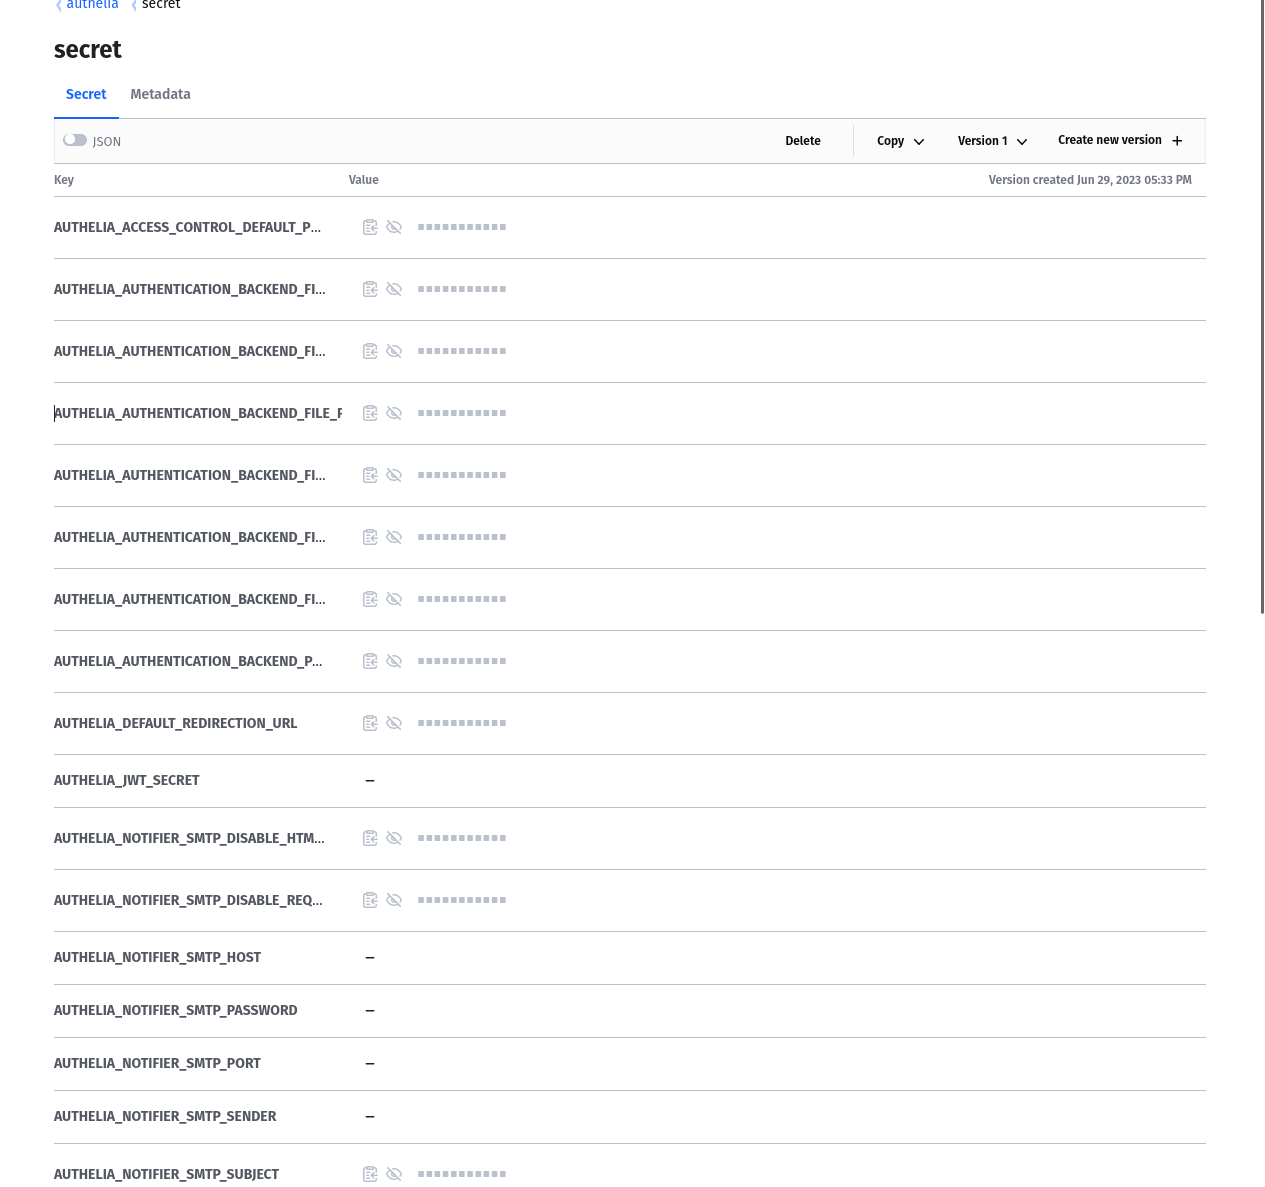
If you change the slider back to the default input screen, you should see the following:
Create read only policy for secret engine
In the policies tab, create a new policy with the following content (adjust the content if your secret engine is not named authelia):
path "authelia/*" {
    capabilities = ["read"]
}Create a vault user
In the next step, we create a new Vault user that will use this policy.
To do this, you need to exit the GUI and continue in the Docker CLI. Alternatively, you can install the vault client from the Hashicorp website.
docker exec -it --user vault vault shIt is important that you define the VAULT_ADDR using the environment variable with localhost. The container does not know anything about the surrounding.
VAULT_ADDR=http://127.0.0.1:8200 vault login
Token (will be hidden):
Success! You are now authenticated. The token information displayed below
is already stored in the token helper. You do NOT need to run "vault login"
again. Future Vault requests will automatically use this token.

Key                  Value
---                  -----
token                hvs.XXX
token_accessor       XXX
token_duration       ∞
token_renewable      false
token_policies       ["root"]
identity_policies    []
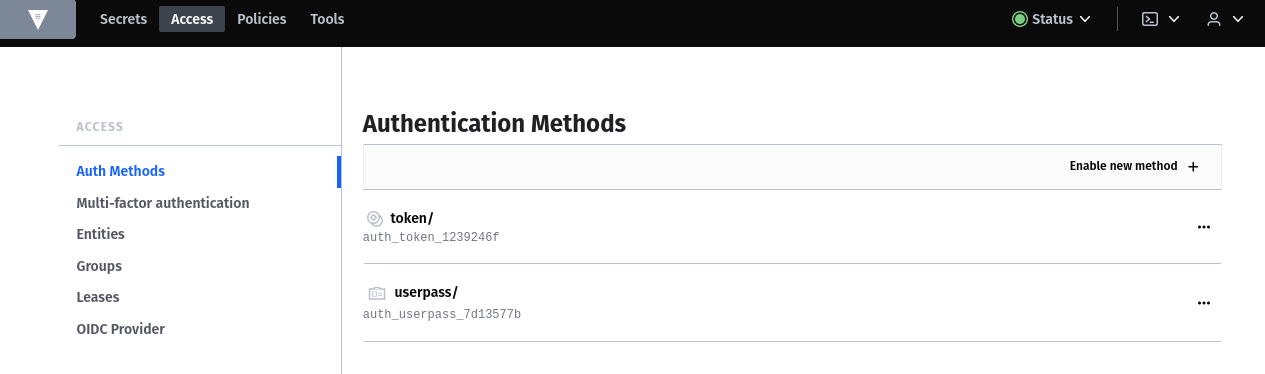
To enable a username password login you must enable the authentication method userpass:
VAULT_ADDR=http://127.0.0.1:8200 vault auth enable userpass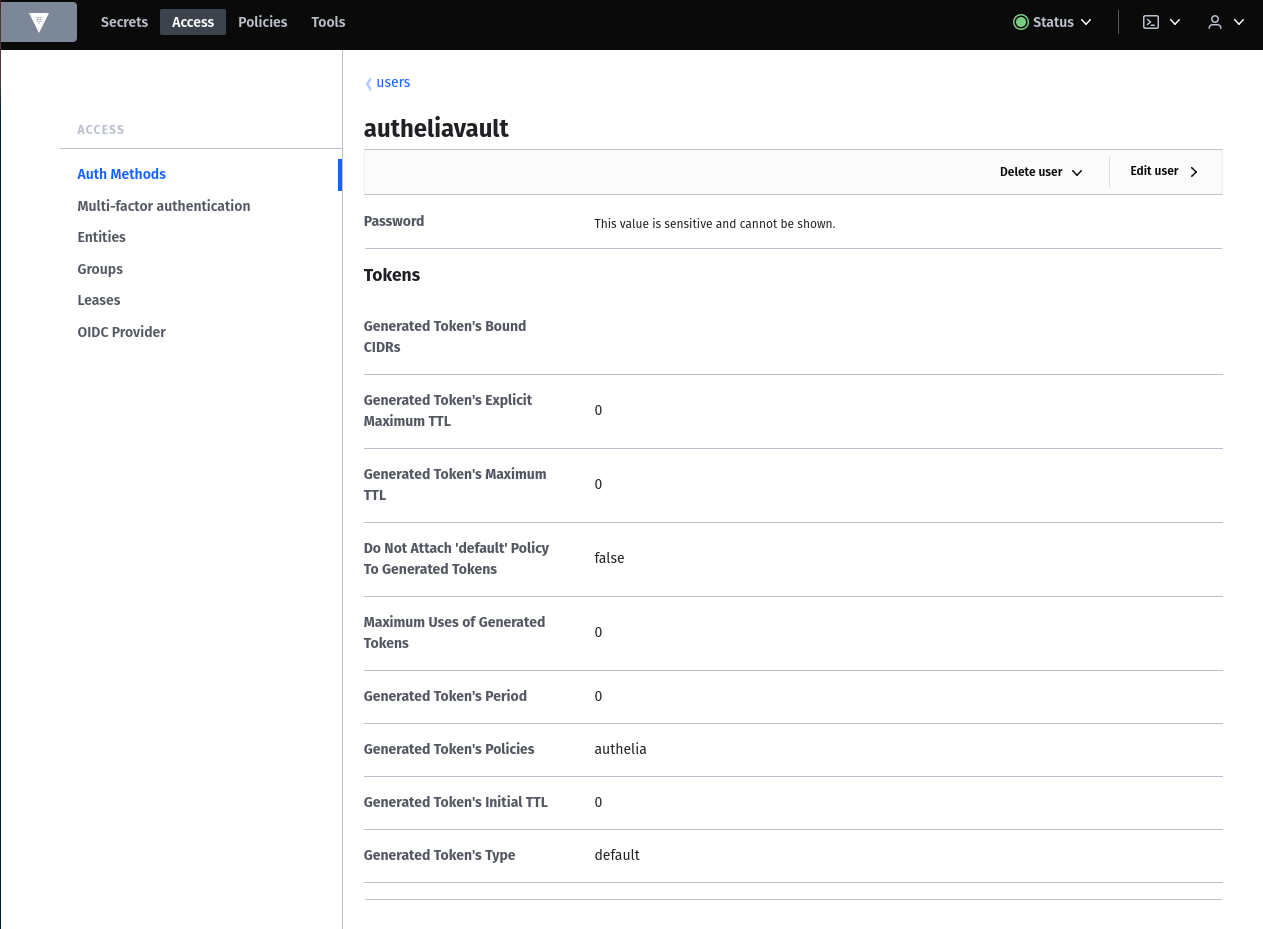
> Success! Enabled userpass auth method at: userpass/In the next step we create the user autheliavault. You can also choose any user. Please replace "UserPass" with a strong password.
VAULT_ADDR=http://127.0.0.1:8200 vault write auth/userpass/users/autheliavault \
    password=UserPass \
    policies=authelia

> Success! Data written to: auth/userpass/users/autheliavaultYou can now find the user in the Vault GUI as a Userpass object. With this username it is also possible to log in to the Vault. There the new user should also see the new Secret Engine.